

Wprowadzenie do błędów przy użyciu rozstawników dla płytek
Przewodnik odstępu płytek Poprawny odstęp między płytkami jest kluczem do osiągnięcia profesjonalnych wyników w każdej instalacji płytek. Poprawne odstępy są Twoim przyjacielem, nie tylko dla wyglądu, ale również dla wsparcia. Wciskane między płytki zapewniają jednolite linie szpachli. Zapewnia szybki, profesjonalny wygląd. Daje dokładne kąty 90 stopni za każdym razem dla lepszych końcowych efektów. Łatwe do umieszczenia w punktach przecięcia podczas instalacji płytek, w budownictwie i remontach domowych. Ponadto, równomiernie rozmieszczone płytki rozprowadzają ciężar równomiernie, zmniejszając szanse na pojawienie się pęknięć lub luźnych płytek w czasie.
Niedopuszczalne użycie odstępników może z kolei spowodować różnorakie problemy. Od niezrównanych szwów cementowych po kwestie integralności strukturalnej, niewłaściwe odstępy mogą zdmuchnąć wiatr z żagli projektu kafelkowego. Kafelki, które nie leżą równo, mogą pozostawić słabe punkty, które skrócą ich żywotność, ponieważ niezgodne przerwy mogą sprawić, że podłoga będzie wyglądała nierównomiernie i nie będą również wykluczać wody. Aby uniknąć tych problemów, potrzebujesz wiarygodnych systemów wyrównywania kafelków lub odpowiednich odstępników i wyrównaczy dla kafelków podłogowych. Gdy unikasz typowych błędów związanych z odstępnikami kafelków, w tym używania niewłaściwego rozmiaru czy rodzaju, możesz uzyskać trwałe, profesjonalnie wyglądające wyniki, nawet jeśli jesteś nowicjuszem w zakresie układania kafelków.
Typowe błędy przy użyciu odległościników
Nierówny rozstaw: Powoduje niezgodność i lippage
Nieregularne odstępy między płytkami są przyczyną niewyrównania, co jest nieestetyczne i jednocześnie osłabia wytrzymałość podłogi. Płytki, które są nierówne, zwanie to lippage, mogą powodować potknięcia i tworzyć trudności przy czyszczeniu. Gdy powierzchnia płytki jest wyższa niż powierzchnia sąsiedniej płytki, jasne jest, że podłoga nie będzie wyrównana, a jeśli zauważysz, że te ściany nie są już tak wyrównane jak wcześniej. Aby uniknąć tych bardzo częstych problemów, postępuj zgodnie z wytycznymi dotyczącymi odstępów między płytkami, ponieważ właściwe odstępy zapobiegą tym problemom. Jeśli poświęcisz czas na umieszczenie każdej płytki w kleju i poprawne ustawienie odstępów, twoja robota z płytkami będzie trwała, a płytki będą wyglądać świetnie przez lata.
Zła wielkość rozstawników: Wpływa na spójność szwu groutowego
Zły rozmiar odstępników płytek może zniekształcić wzór płytek i spójność linii masy, co wymaga większego wysiłku i daje mniej atrakcyjne wyniki. Odstępniki odpowiedniego rozmiaru są niezbędne do uzyskania równych linii masy - kluczowego elementu widowiska dla oczu! Z standardowym rozmiarem stawki masy należy używać odstępników, które są około dwa razy większe niż stawki między płytkami. Gdy wybrano odpowiedni rozmiar odstępników dla rozmiaru płytek i preferencji, idealny, profesjonalny wykończenie jest już w zasięgu ręki, osiągając trwałość i wygląd, który szukasz dla swojej instalacji.
Niewłaściwy czas usunięcia: Może uszkodzić rozmieszczenie płytek
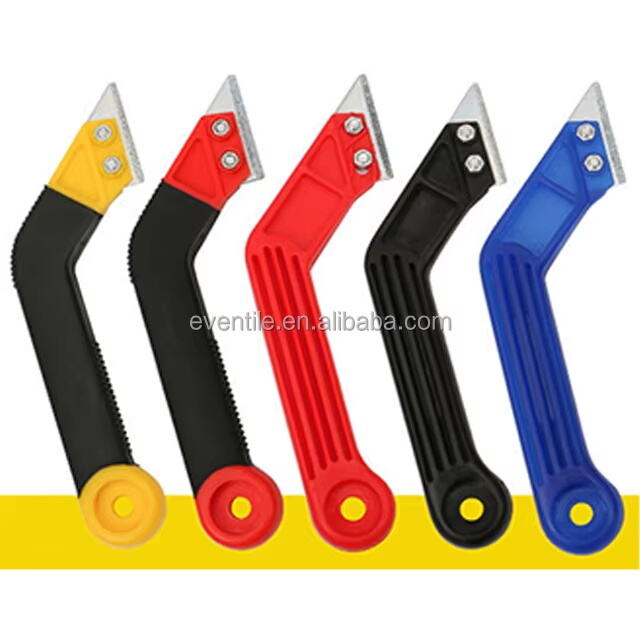
Zdejmowanie rozstawników przed odpowiednim czasem może spowodować przesunięcie płytek, co stworzy wiele problemów i drogie naprawy. Ważne jest, aby dać wystarczająco dużo czasu na utwardzenie się cementu lub kleju, zanim usuniesz rozstawniki płytkowe. Jeśli płytki zostaną usunięte za wcześnie, mogą się przesunąć i zepsuć całą kompozycję. Najlepszym momentem do wykonania tej czynności jest zwykle wtedy, gdy klej już się utwardził, co ogólnie następuje dzień później, zgodnie z rekomendacjami producentów. Bardzo ostrożnie usuń rozstawniki (używam plierszy z haczykami), upewniając się, że nie zaburzisz ich wyrównania.
Pominienie spacersów całkowicie: Powoduje nieprofesjonalny wygląd
Nie używanie odstępników przy kafelkach może prowadzić do 'podwójnego wyglądu' i nieprofesjonalnego efektu końcowego montażu. Odstępniki są kluczowe, jeśli chcesz osiągnąć profesjonalny wygląd, a Twoje kafelki mają różne rozmiary, co tworzy przerwę, która zostanie odpowiednio wypełniona tą samą masą szpachtelową. Bez odstępników praca może łatwo bardzo mocno się popszyć i zakończyć się niepoprawnymi odstępami lub nawet liniami masz szpachtelowej. Używając odstępników między kafelkami, przypuszczasz swoje inżynierskie lub budowlane przedsięwzięcie na zupełnie nowy poziom - osiągając profesjonalne wyniki; czysty strukturalny efekt końcowy.
Jak system wyrównywania płytek rozwiązuje te problemy
Gwarantuje jednolite odstępy i wyrównanie
Użycie systemu wyrównania płytek jest ważne dla spójnego odstępu i zaczepienia płytek. Trzyma płytki na miejscu podczas procesu ustawiania, co gwarantuje, że stawka miedzypłytkowa jest jednolita. Ta jednolicieść jest kluczowa, ponieważ w znacznym stopniu eliminuje ryzyko niewłaściwego wyrównania i lippage – sytuację, gdy płytki są kładzione nierówno, prowadząc do zagrożeń upadkiem i braku jednolitego wyglądu. Innymi słowy, system wyrównania płytek pomaga zapewnić płaski i wolny od lippage wynik we wszystkich rodzajach instalacji płytek.
Uniemożliwia lippage przytrzymując płytki na miejscu
Użycie takiego systemu wyrównania płytek jest kluczowe w redukowaniu zjawiska lippage i uzyskiwaniu idealnie płaskiej powierzchni płytek. Dzięki zapewnieniu małego stawu oraz łączeniu płytek ze sobą, praktycznie eliminuje to lippage, czyli częste zjawisko, w którym sąsiednie płytki nie mają tej samej wysokości. To nie tylko znacząco zwiększa bezpieczeństwo, ponieważ minimalizowany jest ryzyko potknięcia się i upadnięcia, ale również optymalizuje pielęgnację i konserwację, tj. czyszczenie. Badania pokazują, że poprawne zastosowanie systemów wyrównania może całkowicie zapobiec 95% problemów z lippage podczas montażu, dlatego jest to niezbędny narzędzie do uzyskania idealnego efektu końcowego.
Przyspiesza instalację i poprawia wyniki końcowe
Systemy wyrównania płytek, które gwarantują jakość pod względem wartości estetycznej i bezpieczeństwa, mają przyspieszyć całą pracę montażową. Dzięki uproszczeniu procesu osiągany jest szybszy montaż, co bezpośrednio równa się bardziej efektywnemu procesowi dla wykonawcy. Ten zysk na czasie jest szczególnie korzystny przy ukończeniu gotowego produktu i chroni przed kosztownymi błędami wynikającymi z pośpiechu, co ostatecznie pomaga uczynić wykładziny bardziej atrakcyjnymi wizualnie i strukturalnie.
Porady dotyczące skutecznego wyrównywania płytek
Wybór odpowiednich rozmiarów odstępników
Musisz używać odpowiednich rozmiarów odstępników dla szwu, jaki chcesz osiągnąć, bo od tego zależy zarówno funkcjonalność, jak i estetyka Twojego projektu. Pracując z małymi płytkami, takimi jak te w mozaice, lepiej używać gruntu niespiętego, natomiast dla dużych płytek grout spięty jest lepszym rozwiązaniem. Na przykład, małe płytki ścianowe zwykle wymagają odstępników o szerokości 1/16 cala, podczas gdy większe płytki podłogowe mogą wymagać odstępników o szerokości 1/2 cala. (Zawsze warto sprawdzić u producenta zalecane przez nich wymiary). Przydatne są odstępniki równoważne szerokości 1/4 cala. To zapewnia jednostajnie rozmieszczone płytki i może pomóc, aby Twój projekt wykładania wyglądał pięknie przez lata.
Poprawna instalacja klipsów i楔ek wyrównujących
Poprawne położenie klipsów wyrównujących w wszystkich płytkach, jak pokazano na Rysunku C, jest kluczowe dla równych płytek podczas ich utwardzania. Te klipsy trzymają płytke na miejscu podczas ustawiania, co w zasadzie eliminuje nierówności. Użycie wyrównujących klinków do płytek działa świetnie w parze z tym. Chodzi o to, aby dobrze umieścić je w klipsach wyrównujących i osiągnąć odpowiedni ciśnienie i wyrównanie. Nauczenie się sztuki kładzenia płytek na stole może pomóc Ci maksymalnie wykorzystać systemy wyrównujące płytek zarówno dla solidnie ustalonych, jak i idealnie wyrównanych płytek. Ta dokładność oznacza, że nie ma ruchu wyrównującego klinka płytkowego i umożliwia powierzchnię, aby była naprawdę płaska i nie pozostawiała żadnych śladów.
Usuwanie spacerek we właściwym momencie
Dobór terminu usunięcia dystansów jest kluczowy, aby zachować estetykę układania płytek. Dystanse są tymczasowe i należy je usunąć po wystarczającym stwardnieniu kleju, ale przed zaszpachlowaniem. Ograniczenie: Jeśli klej nie dojrzeje odpowiednio zgodnie z zaleceniami producenta podczas mocowania płytek, nie nastąpi sklejenie bez zakłócania dopasowania płytek. Jeżeli poprawnie usuniesz dystanse, bardziej prawdopodobne będzie zachowanie spójnych przerw między płytkami przeznaczonymi do szpachlowania i uniknięcie dotykania płytek. Należy posiadać odpowiednie narzędzia, takie jak gumałek, aby uniknąć pęknięć płytek. Poprawne rozmieszczenie dystansów to podstawa idealnego układania płytek.
Wniosek: Osiągnięcie doskonałej instalacji płytek za pomocą odpowiednich narzędzi
Niezwykle ważne przy profesjonalnym uklejaniu płytek są narzędzia i techniki, które gwarantują, że Twój projekt zostanie wykonany poprawnie i profesjonalnie. Poprawne ich zastosowanie, w połączeniu z odstępami, systemami wyrównującymi oraz staranną uwagą na szczegóły, może pomóc Ci uniknąć często spotykanych problemów, takich jak niezgodność lub brak spójności między szwami. Jeśli właściciele domów i remontowicze znają i praktykują te kluczowe aspekty, można uniknąć popełniania uniknionych błędów, co prowadzi do idealnego efektu ostatecznego. Gdy używasz odpowiednich narzędzi, nie tylko robisz swój projekt lepszym, ale także zapewniajesz, że Twoje płytki będą trwałe w czasie.
Często zadawane pytania
Jaki jest cel odstępników do płytek?
Odstepniki do płytek służą do tworzenia jednolitych odstępów między nimi, co gwarantuje spójne szwy i profesjonalny wygląd. Pomagają one w równomiernym rozłożeniu ciężaru, zmniejszając ryzyko powstania pęknięć lub luźnych płytek w czasie.
Kiedy można usunąć odstepniki po instalacji płytek?
Podpory powinny zostać usunięte, gdy tynk lub klej osiągnie wystarczające utwardzenie, zazwyczaj następnego dnia. Przestrzeganie instrukcji producenta co do czasu wytwarzania jest kluczowe do utrzymania właściwego wyrownania płytek.
Dlaczego system wyrównywania płytek jest ważny?
System wyrownania płytek zapewnia jednolite odstępy i wyrownanie, uniemożliwia nierówności krawędziowe oraz przyspiesza montaż. Blokuje płytki podczas procesu wytwarzania, zmniejszając ryzyko niewłaściwego wyrownania i poprawiając ostateczny efekt.
Spis treści
- Wprowadzenie do błędów przy użyciu rozstawników dla płytek
- Typowe błędy przy użyciu odległościników
- Jak system wyrównywania płytek rozwiązuje te problemy
- Porady dotyczące skutecznego wyrównywania płytek
- Wniosek: Osiągnięcie doskonałej instalacji płytek za pomocą odpowiednich narzędzi
- Często zadawane pytania