

การทำความเข้าใจเกี่ยวกับเกรียงฉาบปูนซีเมนต์: ส่วนประกอบหลักและประเภท
เกรียงฉาบปูนซีเมนต์คืออะไร และเหตุใดจึงมีความสำคัญ?
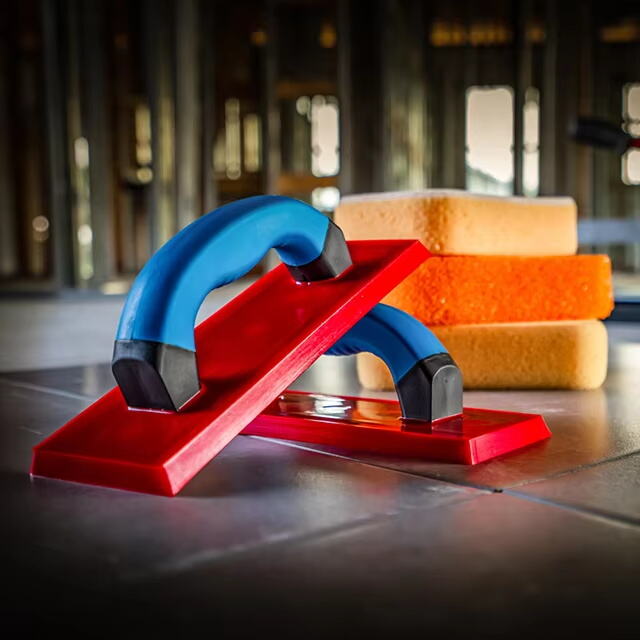
เกรียงฉาบยาแนวถือเป็นเครื่องมือที่จำเป็นสำหรับผู้ที่ทำงานติดตั้งกระเบื้อง เนื่องจากถูกออกแบบมาเพื่อใช้สำหรับการปาดและปรับระดับยาแนวให้ทั่วช่องว่างเล็กๆ ระหว่างกระเบื้อง เมื่อทำงานได้อย่างถูกต้อง เครื่องมือนี้จะช่วยให้ได้แนวยาแนวที่เรียบเสมอกัน ทั้งสวยงามและใช้งานได้ดีขึ้น หากไม่ได้ทำยาแนวอย่างเหมาะสม กระเบื้องอาจดูเป็นหย่อมๆ หรือแย่กว่านั้นคือ เริ่มหลุดล่อนออกมาตามกาลเวลา เกรียงคุณภาพดีจะช่วยให้ช่างควบคุมปริมาณยาแนวที่ใช้ได้อย่างแม่นยำ ทำให้ไม่มีวัสดุเหลือใช้โดยไม่จำเป็นหลังงานเสร็จสิ้น ผู้รับเหมาติดตั้งกระเบื้องต่างรู้ดีว่าสิ่งนี้ช่วยประหยัดค่าวัสดุแต่ยังคงได้ผลงานที่มีมาตรฐาน แนวยาแนวที่สม่ำเสมอคือสิ่งที่สร้างความแตกต่างไม่ว่าจะเป็นการจัดวางลวดลายโมเสกที่ซับซ้อนบนผนังห้องน้ำ หรือการติดตั้งกระเบื้องพื้นที่ต้องทนทานต่อการเดินเหยียบในพื้นที่ครัว
ประเภทของไม้ปาดร่องยาแนวที่แตกต่างกัน: แบบยาง, แบบโฟม และแบบอีพ็อกซี
มีไม้ฉาบยาแนวหลายประเภทที่วางขายอยู่ในท้องตลาด โดยแต่ละชนิดถูกออกแบบมาเพื่อใช้งานในงานเฉพาะทางภายในบ้านโดยเฉพาะ ไม้ฉาบยาง (Rubber floats) น่าจะเป็นสิ่งที่คนส่วนใหญ่เลือกใช้เป็นอันดับแรก เนื่องจากมีความทนทานและเหมาะสำหรับงานยาแนวทั่วไป โดยไม่ต้องเสียค่าใช้จ่ายมาก พวกมันสามารถงอได้เล็กน้อยเพื่อเข้าถึงจุดแคบๆ แต่ยังคงความแข็งแรงทนทานต่อการใช้งานตามปกติ แต่โฟมไม้ฉาบ (Foam floats) กลับมีวัตถุประสงค์ในการใช้งานที่แตกต่างออกไปโดยสิ้นเชิง เนื่องจากพวกมันนุ่มและเบามาก จึงไม่ทำให้กระเบื้องเซรามิกส์หรูหราหรือพื้นผิวกระจกที่บอบบางเสียหาย ช่างมักเลือกใช้ไม้ฉาบโฟมเมื่อต้องทำงานกับกระเบื้องหินอ่อนหรือกระเบื้องพอร์ซเลนที่รับแรงกดได้น้อย จากประสบการณ์ที่ผมได้เห็นในสถานที่ทำงานตลอดหลายปีที่ผ่านมา ไม้ฉาบยางยังคงเป็นตัวเลือกหลักสำหรับงานยาแนวทั่วไป เนื่องจากสามารถปรับใช้ได้กับเกือบทุกสภาพงาน แต่ก็อย่ามองข้ามไม้ฉาบโฟมไปเช่นกัน หากโครงการนั้นมีวัสดุที่เปราะบาง ส่วนไม้ฉาบสำหรับยาแนวอีพ็อกซี (Epoxy grout floats) นั้นออกแบบมาเฉพาะสำหรับยาแนวชนิดพิเศษที่ยึดติดได้ดีเยี่ยมและกันน้ำได้อย่างมีประสิทธิภาพ มักจะต้องใช้ไม้ฉาบเหล่านี้สำหรับพื้นห้องน้ำหรือผนังหลังเคาน์เตอร์ครัวที่มักมีปัญหาเรื่องความชื้น ไม่มีใครกล้าเสี่ยงใช้ไม้ฉาบอีพ็อกซีเลย เว้นแต่ว่าจะต้องเผชิญกับความท้าทายเรื่องการกันน้ำที่จริงจังในพื้นที่ที่มีความชื้น
ข้อควรพิจารณาเกี่ยวกับวัสดุของเกรียงฉาบปูน
ยางเทียบกับพลาสติก: การเปรียบเทียบความยืดหยุ่นและความทนทาน
เมื่อถึงเวลาเลือกเกรียงฉาบยาแนว ช่างปูกระเบื้องส่วนใหญ่จะบอกคุณว่าการเลือกใช้เกรียงทำจากยางหรือพลาสติกนั้นมีความสำคัญมาก เนื่องจากวัสดุทั้งสองชนิดมีพฤติกรรมที่แตกต่างกันมากในเรื่องความยืดหยุ่นและการใช้งานซ้ำบ่อยครั้ง เกรียงยางมีความยืดหยุ่นที่ดี ทำให้เกาะติดพื้นผิวขณะใช้งานได้ดีแม้ผนังหรือพื้นจะมีรอยนูนหรือรอยบุบเล็กน้อย การที่เกรียงยางสามารถงอได้ช่วยให้สามารถฉาบยาแนวได้อย่างสม่ำเสมอไม่ว่าจะเป็นยาแนวหยาบแบบผสมทราย หรือยาแนวชนิดเนื้อเนียนที่ใช้ตามห้องน้ำหรือห้องครัว ผู้ที่ต้องทำงานปูกระเบื้องเป็นเวลานานมักชื่นชอบความรู้สึกที่เกรียงยางจับถนัดมือและไม่ลื่นหลุดมือขณะใช้งาน อย่างไรก็ตาม เกรียงพลาสติกมีความทนทานกว่าเมื่อใช้งานไปเรื่อย ๆ แต่ก็ไม่สามารถเทียบได้กับเกรียงยางในบริเวณที่มีพื้นผิวขรุขระหรือไม่เรียบสม่ำเสมอ คนทั่วไปที่เราได้พูดคุยด้วยมักแนะนำให้ใช้เกรียงยางเพื่อให้ได้รอยยาแนวที่ตรงและเป็นระเบียบ ซึ่งเมื่อแห้งและเซตัวดีแล้วจะให้ผลลัพธ์ที่ดูดีกว่า
การใช้ไม้ปาดเรซินแบบพิเศษ: เวลาที่ควรเลือกใช้วัสดุที่มีความแข็งแรงสูง
ตะแกรงเรซินสำหรับปูนฉาบแบบอีพ็อกซีมีจุดประสงค์การใช้งานที่เฉพาะเจาะจงมากเมื่อต้องจัดการกับวัสดุอีพ็อกซีที่เหนียวและเหนียวหนืดซึ่งเครื่องมือทั่วไปไม่สามารถจัดการได้ สิ่งที่ทำให้ตะแกรงเหล่านี้แตกต่างคือโครงสร้างที่แข็งแรงซึ่งช่วยป้องกันไม่ให้ปูนฉาบยึดติดแน่นเกินไปในระหว่างการใช้งาน ทำให้กระบวนการทั้งหมดจัดการได้ง่ายขึ้นมาก เครื่องมือเหล่านี้แสดงศักยภาพได้ดีที่สุดในสถานการณ์ที่ความแม่นยำมีความสำคัญสูงสุด เช่น โครงการเชิงพาณิชย์หรือการติดตั้งแบบกำหนดเองที่ไม่สามารถให้เกิดข้อผิดพลาดได้ ผู้เชี่ยวชาญด้านการปูกระเบื้องส่วนใหญ่ต่างไว้วางใจในตะแกรงอีพ็อกซีเมื่อใดก็ตามที่พวกเขาต้องทำงานกับส่วนผสมปูนฉาบที่มีความหนาแน่นสูง ซึ่งเป็นสิ่งที่ North American Tile Council ได้กล่าวถึงไว้ในคู่มือการติดตั้งของพวกเขา โรงงานอาหาร อุตสาหกรรม โกดัง และสถานที่อื่น ๆ ที่ต้องการพื้นผิวที่ทนทานและใช้งานได้ยาวนาน จะได้รับประโยชน์อย่างมากจากการใช้เครื่องมือพิเศษเหล่านี้ เมื่อต้องเผชิญกับลวดลายกระเบื้องที่ซับซ้อนหรือพื้นที่ขนาดใหญ่ที่ต้องการการฉาบปูน ผู้รับเหมาที่มีประสบการณ์รู้ดีว่าการมีตะแกรงอีพ็อกซีที่ดีติดไว้ใช้งานนั้น คือเส้นแบ่งระหว่างการได้พื้นผิวที่สมบูรณ์แบบกับการต้องเสียเวลากับงานทำความสะอาดเป็นเวลานานหลายชั่วโมง
คู่มือการเลือกขนาดของไม้ปาดเรซิน
การเลือกขนาดฟลูตให้เหมาะสมกับมิติและช่องว่างของกระเบื้อง
การเลือกขนาดของเกรียงยาแนวให้เหมาะสมมีความสำคัญมากเมื่อต้องการยาแนวอย่างถูกต้อง โดยเฉพาะเมื่อพูดถึงกระเบื้องที่มีขนาดแตกต่างกัน และรอยต่อระหว่างกระเบื้องเหล่านั้น เกรียงที่ดีสามารถสร้างความแตกต่างได้ตั้งแต่เริ่มต้นจนจบงาน ในการเลือกเกรียง ควรตรวจสอบให้แน่ใจว่าขนาดของเกรียงนั้นเหมาะสมกับประเภทของกระเบื้องที่ใช้อยู่ เพื่อให้การปูยาแนวครอบคลุมทั่วถึงอย่างสม่ำเสมอ โดยไม่ก่อให้เกิดความเสียหายระหว่างทำงาน เกรียงขนาดใหญ่เกินไปมักทำให้เกิดปัญหาเวลาใช้กับกระเบื้องเล็ก เพราะจะทำให้ปูยาแนวมากเกินไป ในขณะที่เกรียงขนาดเล็กเกินไปกลับไม่สามารถใช้กับกระเบื้องขนาดใหญ่ได้อย่างมีประสิทธิภาพ ผู้รับเหมาที่มีประสบการณ์จากการทำงานปรับปรุงห้องน้ำมานับครั้งไม่ถ้วนต่างทราบเรื่องนี้ดีจากประสบการณ์ตรงของพวกเขาเอง หลายคนพบว่าการเลือกใช้เกรียงขนาดใหญ่เหมาะที่สุดสำหรับพื้นที่กว้างที่ปูด้วยกระเบื้องขนาดใหญ่ ในขณะที่เกรียงขนาดเล็กเหมาะกับรายละเอียดที่ซับซ้อนมากกว่า การปฏิบัติตามหลักการง่ายๆ นี้จะช่วยประหยัดค่าใช้จ่ายจากวัสดุที่เสียทิ้ง และเร่งความเร็วของกระบวนการทั้งหมดได้อย่างมาก
การจับยึดที่เหมาะสม: ความกว้างของไม้ฉาบส่งผลต่อประสิทธิภาพในการใช้งานอย่างไร
ความกว้างของไม้ฉาบมีบทบาทสำคัญต่อความรู้สึกสะดวกในการใช้งานและประสิทธิภาพในการทำงานเมื่อต้องทำงานปูกระเบื้องเป็นเวลานาน ไม้ฉาบที่กว้างกว่าจะช่วยให้ฉาบปูนได้ในพื้นที่มากขึ้น แต่ก็มีน้ำหนักมากขึ้นตามมา ซึ่งทำให้เกิดความเมื่อยล้าได้ง่ายเมื่อต้องทำงานต่อเนื่องกันหลายชั่วโมง ในขณะที่ไม้ฉาบที่แคบกว่าจะให้การควบคุมที่ดีกว่าและใช้งานได้คล่องตัวรอบๆ กระเบื้อง พนักงานปูกระเบื้องหลายคนได้สัมผัสความเชื่อมโยงระหว่างขนาดของไม้ฉาบและความรู้สึกสบายด้วยตนเอง เมื่อทำงานใหญ่ที่ต้องคำนึงถึงเวลา การเลือกไม้ฉาบที่จับถนัดมือจะช่วยให้แตกต่างอย่างมาก ดีไซน์ที่คำนึงถึงสรีรศาสตร์ช่วยให้รักษากำลังการจับไว้ได้นานขึ้น และลดอาการปวดข้อมือ ควรพิจารณาว่าลักษณะงานที่ต้องทำคืออะไร และอะไรคือสิ่งที่รู้สึกว่าเหมาะกับตัวเองเวลาเลือกขนาดไม้ฉาบ การเลือกความกว้างที่เหมาะสมจะช่วยให้การฉาบปูนเป็นไปอย่างราบรื่น โดยไม่ทำให้เกิดอาการบาดเจ็บจากการใช้งานมากเกินไป
คุณสมบัติหลักที่ช่วยเพิ่มประสิทธิภาพการใช้งานเกรียงปูปูน
พื้นผิวที่ไม่ดูดซับน้ำสำหรับการทำให้เส้นปูนฉาบร่องสะอาด
เมื่อพูดถึงการเลือกไม้ฉาบยาแนว ควรเลือกแบบที่มีพื้นผิวที่ไม่ดูดซับน้ำ เพราะจะช่วยให้รอยยาแนวแลดูคมชัด และป้องกันการสะสมของคราบตกค้างที่น่าหงุดหงิดได้ ข่าวดีเกี่ยวกับผิวสัมผัสที่ไม่ดูดซับน้ำเหล่านี้คือสามารถเช็ดทำความสะอาดได้ง่าย ทำให้เราไม่ต้องเสียเวลากำจัดคราบซีเมนต์ตกค้างเพราะไม่มีสิ่งใดเกาะติดบนพื้นผิว ในทางกลับกัน หากใครเลือกใช้ผิวสัมผัสที่ดูดซับน้ำ ลองเดาสิว่าจะเกิดอะไรขึ้น อนุภาคของยาแนวจะเกาะติดอยู่บนพื้นผิวนั้น ทำให้ทำความสะอาดลำบาก และอาจส่งผลต่อประสิทธิภาพการทาของยาแนวจริงโดยตรง ช่างปูกระเบื้องที่เปลี่ยนมาใช้ไม้ฉาบที่ไม่ดูดซับน้ำต่างรายงานว่าได้ผลลัพธ์ที่ดีกว่าในงานของพวกเขา ไม่เพียงแค่สามารถวางแนวเส้นได้สะอาดและง่ายขึ้นเท่านั้น แต่ยังช่วยลดเวลาในการทำความสะอาด และทำให้งานปูกระเบื้องโดยรวมดูดีขึ้นอย่างชัดเจน บางคนยังสังเกตได้ว่ากระเบื้องของพวกเขายังคงสภาพใหม่อยู่ได้นานขึ้นเมื่อใช้ไม้ฉาบแบบนี้อย่างสม่ำเสมอ
ขอบเอียงสำหรับการทำงานแม่นยำในพื้นที่แคบ
ขอบที่ออกแบบมาให้เอียงในหลายรุ่นของแผ่นขัดยาแนวที่ใช้ในการปูกระเบื้องนั้น มีความแตกต่างอย่างชัดเจนเมื่อต้องทำงานในจุดที่ยากต่อการเข้าถึงและมุมแคบต่าง ๆ ระหว่างการปูกระเบื้อง ขอบที่ออกแบบพิเศษเหล่านี้สามารถเข้าไปในพื้นที่ที่เป็นไปไม่ได้สำหรับเครื่องมือทั่วไป ทำให้สามารถทาสารยาแนวได้อย่างทั่วถึงทั่วทั้งพื้นผิว ยกตัวอย่างเช่น กระเบื้องโมเสก ชิ้นส่วนเล็ก ๆ เหล่านี้สร้างมุมเล็กมุมน้อยจำนวนมาก ซึ่งแผ่นขัดธรรมดาไม่สามารถทำงานได้ดีเลย ช่างปูกระเบื้องที่ผมได้พูดคุยด้วยมักจะกล่าวเป็นเสียงเดียวกันว่าผลงานสุดท้ายของพวกเขามีคุณภาพดีขึ้นมากเมื่อใช้แผ่นขัดที่มีขอบเอียงเหล่านี้แทนแบบธรรมดา พวกเขาได้กล่าวถึงเส้นสายที่สะอาดกว่าและขอบที่เรียบร้อยมากขึ้น โดยเฉพาะในลายที่มีความซับซ้อนซึ่งต้องการความแม่นยำในการจัดวางให้ตรงกันทุกส่วน เมื่อได้สังเกตช่างปูกระเบื้องที่มีประสบการณ์หลายคนขณะทำงานที่ซับซ้อน จึงเข้าใจได้ว่าทำไมส่วนใหญ่จึงกลับมาใช้แผ่นขัดขอบเอียงนี้ซ้ำแล้วซ้ำอีกเมื่อต้องทำงานละเอียด
เทคนิคการใช้งานจริงโดยใช้แผ่นขัดยาแนว
วิธีการปาดแนวทแยงเพื่อให้การเคลือบยาแนวนั้นสม่ำเสมอ
การใช้เทคนิคการปาดแนวทแยงนั้นสร้างความแตกต่างอย่างมากเมื่อต้องการได้รอยยาแนวที่สม่ำเสมอในแต่ละข้อต่อของกระเบื้อง โดยสิ่งที่เราทำคือการปาดตัวยาแนวในมุมประมาณ 45 องศา เทียบกับจุดที่กระเบื้องแต่ละแผ่นมาบรรจบกัน วิธีนี้ได้ผลดีมากเพราะสามารถเติมเต็มช่องว่างเหล่านั้นได้อย่างเหมาะสม โดยไม่กักอากาศไว้ด้านล่าง งานปูกระเบื้องจะออกมาดูดีขึ้นมากเมื่อทำด้วยวิธีนี้ เนื่องจากตัวยาแนวจะกระจายตัวออกอย่างสม่ำเสมอทั่วทั้งพื้นผิว ไม่มีใครต้องการให้เกิดช่องว่างหรือรอยที่ดูไม่สวยงามปรากฏขึ้นบนพื้นใหม่ที่สวยงามของตนหลังจากที่ทุกอย่างแห้งสนิท
เพื่อให้ใช้วิธีการปาดแนวทแยงได้อย่างถูกต้อง ให้ทำตามขั้นตอนเหล่านี้:
- เริ่มต้นด้วยการผสมยาแนวให้ได้ความหนาแน่นที่เหมาะสม ตรวจสอบให้แน่ใจว่ายาแนวไม่ข้นหรือเจือจางเกินไป
- ปาดยาแนวลงบนพื้นผิวกระเบื้องโดยใช้ไม้ปาดยาแนว ในมุม 45 องศา เทียบกับข้อต่อ
- ทำการปาดยาแนวในลักษณะแนวทแยงเพื่อให้คลุมพื้นที่ทั้งหมด ตรวจสอบให้แน่ใจว่าไม้ปาดแนบสนิทกับข้อต่อเป็นอย่างดี
- ปล่อยให้ยาแนวเซตัวประมาณสักครู่ ก่อนที่จะใช้ฟองน้ำเปียกเช็ดส่วนเกินออก
ผู้เชี่ยวชาญในอุตสาหกรรมแนะนำวิธีนี้เนื่องจากมีประสิทธิภาพในการลดของเสียและเพิ่มพื้นที่การใช้งาน การวิเคราะห์ทางสถิติแสดงให้เห็นว่าการใช้วิธีการถมแนวเฉียงสามารถเพิ่มความสม่ำเสมอของการคลุมได้สูงถึง 30% ส่งผลให้ได้ผลงานที่มีลักษณะเป็นมืออาชีพมากยิ่งขึ้น
การควบคุมแรงดัน: ป้องกันการสะสมของเนื้อปูนซีเมนต์ในรอยต่อ
การใช้แรงกดที่เหมาะสมขณะปาดกาวซีเมนต์มีความสำคัญอย่างมากต่อความสวยงามและความแข็งแรงของรอยต่อ หากกดแรงเกินไปจะทำให้กาวซีเมนต์กองขึ้นมาเป็นก้อน ทำให้เกิดรอยนูนที่ไม่น่ามองเห็นระหว่างกระเบื้อง แต่ถ้ากดเบาเกินไป รอยต่อก็จะไม่แน่น อาจเกิดรอยร้าวตามมาในอนาคต การหาจุดที่เหมาะสมที่สุด ซึ่งกาวซีเมนต์สามารถเติมได้โดยไม่ต้องบังคับให้เข้าที่นั้น ต้องอาศัยการฝึกฝน แต่จะให้ผลลัพธ์ที่ดีเยี่ยมในเรื่องเส้นสายที่สะอาดและคงทนยาวนาน
เพื่อควบคุมแรงดันให้มีประสิทธิภาพ พิจารณาวิธีการเหล่านี้:
- เลือกใช้แผ่นยางปาดปูนซีเมนต์ที่ช่วยให้การกระจายเนื้อปูนซีเมนต์ทั่วถึงและควบคุมแรงที่กระทำต่อรอยต่อได้อย่างเหมาะสม
- ฝึกใช้แรงเบาๆ เพื่อหลีกเลี่ยงการเติมเนื้อปูนซีเมนต์มากเกินไป โดยเฉพาะบริเวณรอยต่อขนาดเล็กหรือแคบ
- ตรวจสอบรอยต่ออย่างสม่ำเสมอเพื่อให้ได้รอยต่อเรียบเนียน ปรับแรงดันตามความจำเป็นเพื่อรักษาความสม่ำเสมอ
การศึกษาจากการใช้งานจริงแสดงให้เห็นว่าการควบคุมแรงกดที่มีประสิทธิภาพไม่เพียงแต่ช่วยปรับปรุงรูปลักษณ์ที่เสร็จสมบูรณ์เท่านั้น แต่ยังช่วยเพิ่มอายุการใช้งานของรอยต่อยาแนวอีกด้วย ผู้เชี่ยวชาญสามารถรับประกันผลลัพธ์ที่แข็งแรงทนทานและสวยงามได้ด้วยการให้ความสำคัญกับการจัดการแรงกดระหว่างการใช้งาน
คำถามที่พบบ่อยเกี่ยวกับหัวยาร์น
หน้าที่หลักของหัวยาร์นคืออะไร
หัวยาร์นมีการออกแบบมาเพื่อใช้ในการปาดและปรับให้ยาร์นเรียบระหว่างกระเบื้อง โดยทำให้เส้นยาร์นมีความสม่ำเสมอและเรียบเนียน ช่วยเสริมทั้งความสวยงามและการใช้งานของพื้นผิวที่ปูด้วยกระเบื้อง
ฉันควรเลือกใช้หัวยาร์นแบบใดสำหรับยาร์นอีพ็อกซี่
แนะนำให้ใช้หัวยาร์นอีพ็อกซี่สำหรับงานยาร์นอีพ็อกซี่ เนื่องจากมีการออกแบบเฉพาะทางและสามารถรองรับคุณสมบัติการยึดติดและการกันน้ำของยาร์นอีพ็อกซี่ได้อย่างมีประสิทธิภาพ
พื้นผิวที่ไม่ดูดซับบนหัวยาร์นช่วยกระบวนการยาร์นอย่างไร
พื้นผิวที่ไม่ดูดซับจะป้องกันการสะสมของเศษสกปรก ช่วยให้รอยยาแนวสะอาดและทำความสะอาดง่าย ซึ่งในที่สุดจะเพิ่มคุณภาพและความสวยงามของงานปูกระเบื้อง
เหตุใดจึงแนะนำให้ใช้วิธีการปาดแบบทแยง?
วิธีการปาดแบบทแยงจะช่วยให้การเคลือบยาแนวนั้นสม่ำเสมอ และลดโอกาสการเกิดช่องว่างอากาศ ทำให้พื้นผิวที่ปูกระเบื้องมีลักษณะสวยงามมากขึ้นโดยรวม
การควบคุมแรงดันมีผลอย่างไรต่อความสมบูรณ์ของรอยต่อยาแนว?
การควบคุมแรงดันที่มีประสิทธิภาพจะป้องกันการสะสมของยาแนว และหลีกเลี่ยงรอยตะเข็บที่อ่อนแอจนนำไปสู่การแตกร้าว ทำให้ได้รอยยาแนวที่เรียบร้อยและทนทาน