

Porozumění moderním technologiím pokládky dlaždic
Vývoj technik pokládky dlaždic zásadně změnil způsob, jakým odborníci i nadšenci do této činnosti přistupují ke svým projektům. V samém středu této transformace stojí systém vyrovnávání dlaždic, inovativní řešení, které se stalo nepostradatelným pro dosažení dokonalé pokládky dlaždic. Tento komplexní průvodce podrobně rozebírá vše, co potřebujete vědět o efektivním použití systému vyrovnávání dlaždic, a zajistí, že vaše projekty budou pokaždé odpovídat profesionálním standardům.
Základní součásti systému vyrovnávání dlaždic
Vysvětlení držáků a vložek
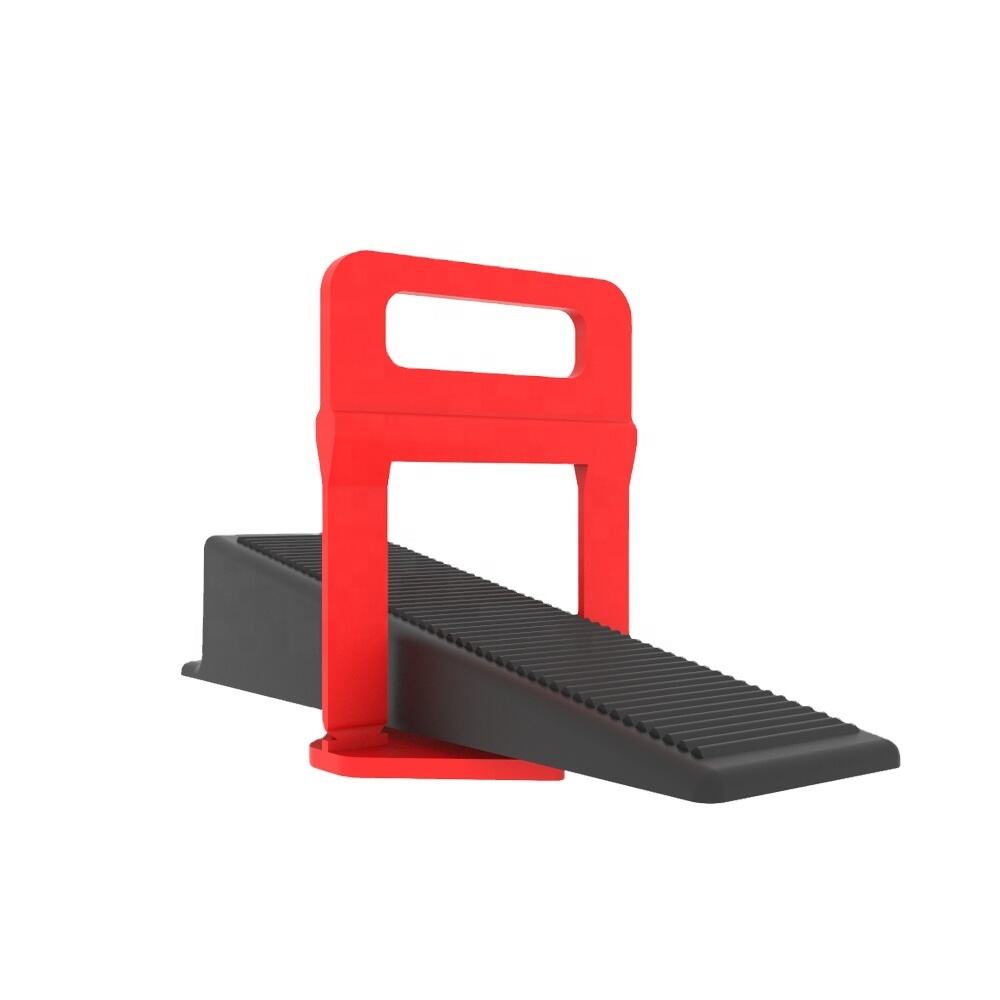
Základem každého systém vyrovnávání dlaždic začíná svými základními komponenty. Kliky, obvykle vyrobené z plastu nebo kovu vyšší třídy, slouží jako hlavní mechanismus pro vyrovnání. Tyto kliky jsou navrženy tak, aby uchytily okraje sousedních dlaždic a udržely je přesně ve stejné výšce, dokud se maltová hmota netvrdne. Moderní návrhy rozpěrek umožňují různou tloušťku dlaždic, od 3 mm do 12 mm nebo více, čímž jsou dostatečně univerzální pro většinu instalačních projektů.
Kvalitní upínací prvky jsou vybaveny pečlivě navrženými zlomovými body, které umožňují čisté odstranění poté, co maltová hmota ztvrdne. Díly sloužící jako vzdáleník zajistí stálé mezery mezi dlaždicemi a tím správné spáry pro maltu, zatímco vyrovnávací mechanismus plní svou funkci. Porozumění těmto součástem je klíčové pro výběr vhodného systému podle konkrétních požadavků projektu.
Klíny a instalační nástroje
Klínek vyrovnávacího systému dlaždic pracuje ve spojení s upínacími prvky a zajišťuje tak vyrovnání. Když je vložen do upínacího prvku, klínek rovnoměrně tlačí na okraje dlaždic a nutí je tak do dokonalého zarovnání. Profesionální klíny jsou obvykle znovupoužitelné, což u větších projektů přináší úspory nákladů.
Speciální instalační nástroje, včetně kleští a napínacích zařízení, systém doplňují. Tyto nástroje zajišťují rovnoměrné přitížení všech klínů, čímž prevence přílišného utažení, které by mohlo ohrozit instalaci. Správné použití těchto nástrojů výrazně ovlivňuje konečný výsledek a proto jsou nezbytnou investicí pro každý poctivý projekt s pokládkou dlaždic.
Přípravný a plánovací proces
Posouzení a příprava povrchu
Než začnete s instalací jakéhokoli systému vyrovnání dlaždic, je důkladná příprava povrchu zásadní. Začněte vyhodnocením podkladu na rovinatost pomocí dlouhého vodováhy, abyste identifikovali výstupky nebo prohlubně. Tyto nedokonalosti odstraňte vhodnými vyrovnávacími hmotami nebo broušením, protože ani ten nejlepší systém vyrovnání dlaždic nemůže kompenzovat výrazně nerovný povrch.
Důkladně vyčistěte povrch pro instalaci, odstraňte prach, nečistoty nebo jiné příměsi, které by mohly ovlivnit přilnavost malty. Věnujte zvláštní pozornost rohům a okrajům, kde budou umístěny vyrovnávací svorky, protože tyto oblasti jsou klíčové pro dosažení optimálních výsledků.
Rozvržení a plánování vzoru
Strategické umístění vyrovnávacích svorek začíná správným plánováním rozvržení. Vytvořte podrobný plán, který zohlední velikost dlaždic, návrh vzoru a očekávané problematické oblasti, jako jsou rohy nebo přechody. Na povrchu vyznačte referenční čáry, které usměrní umístění svorek a zajistí rovnoměrné rozložení tlakových bodů.
Zvažte specifické požadavky zvoleného materiálu dlaždic, protože u přírodního kamene může být zapotřebí jiné rozestupy svorek než u porcelánu nebo keramických dlaždic. Tato fáze plánování pomáhá optimalizovat využití materiálu, snižuje odpad a zajišťuje konzistentní výsledky po celé ploše instalace.

Techniky instalace a osvědčené postupy
Správné umístění svorek
Úspěšná instalace systému vyrovnání dlaždic závisí především na správném umístění upínacích kolíků. Umístěte kolíky do všech rohů, kde se stýkají čtyři dlaždice, a podél hran, kde se spojují dvě dlaždice. U větších formátů dlaždic mohou být pro zabránění nerovnostem (lippage) potřeba další kolíky podél okrajů. Udržujte konzistentní vzdálenost mezi kolíky, aby bylo zajištěno rovnoměrné rozložení tlaku.
Při práci s obdélníkovými dlaždicemi věnujte zvláštní pozornost delším hranám, kde je větší pravděpodobnost vzniku nerovností. Umisťujte kolíky v pravidelných intervalech, obvykle každých 20–30 cm, v závislosti na velikosti dlaždic a doporučení výrobce. Tento systematický přístup pomáhá udržet profesionální kvalitu po celou dobu instalace.
Metody nanášení malty
Účinnost jakéhokoli systému vyrovnávání dlaždic závisí do značné míry na správném nanášení maltového tmelu. Používejte vhodné velikosti hladítek a techniky, abyste dosáhli optimálního pokrytí. Nanášejte tmelem přímé pruhy rovnoběžně s nejdelší hranou dlaždice a udržujte po celé ploše stejnou tloušťku.
Dodatečné potření zadní strany větších dlaždic tmelem pomáhá zajistit plný kontakt a podporu, což je obzvláště důležité při použití systému vyrovnávání dlaždic. Tento dodatečný krok zabraňuje dutinám, které by mohly vést k prasklým dlaždicím nebo selhání instalace v budoucnu. Během celého procesu instalace sledujte konzistenci malty a upravujte ji podle potřeby, aby zůstala zpracovatelná.
Běžné výzvy a řešení
Správa instalací v rozích
Rohy a okraje představují při použití systému vyrovnávání dlaždic zvláštní výzvu. Tyto oblasti často vyžadují zvláštní pozornost, aby bylo zajištěno správné zarovnání a zabránilo se nerovnostem povrchu. Používejte v případě dostupnosti rohové upínací svorky nebo upravte standardní svorky tak, aby vyhovovaly těmto náročným oblastem, a zároveň poskytovaly správnou podporu.
U vnějších rohů zvažte použití specializovaných rohových lišt v kombinaci se systémem vyrovnávání dlaždic. Tento přístup nejen zajišťuje správné zarovnání, ale také poskytuje profesionální dokončený vzhled a chrání náchylné okraje dlaždic.
Práce s různou tloušťkou dlaždic
Při práci s dlaždicemi různé tloušťky je klíčové pečlivé plánování a úprava systému vyrovnávání dlaždic. Použijte vhodné rozpěrky nebo podložky k vyrovnání rozdílů v tloušťce, čímž zajistíte hladký přechod mezi různými materiály. Tato pozornost k detailu předchází zjevným přechodům, které by mohly ovlivnit konečný vzhled.
Zvažte vytvoření návrhů přechodů mezi dlaždicemi různé tloušťky ještě před zahájením celé instalace. Tato zkouška pomáhá identifikovat potenciální problémy a umožňuje upravit strategii dříve, než dojde k definitivní instalaci.
Nejčastější dotazy
Jak dlouho bych měl ponechat systém vyrovnávání dlaždic na místě?
Systém vyrovnávání dlaždic by měl zůstat na místě nejméně 24 hodin, aby omítka měla dostatek času na dosažení počátečního tuhnutí. Ovšem vždy zkontrolujte doporučení konkrétního výrobce omítky, protože některé instalace mohou vyžadovat delší dobu tuhnutí v závislosti na prostředí a specifikacích materiálu.
Mohu znovu použít komponenty systému vyrovnávání dlaždic?
Zatímco klíny jsou obvykle znovupoužitelné, držáky jsou navrženy pro jednorázové použití a po odstranění by měly být zahozeny. Pokus o opakované použití držáků může ohrozit jejich účinnost a potenciálně negativně ovlivnit kvalitu následných instalací.
Jaký je doporučený rozestup mezi držáky u velkoformátových dlaždic?
U velkoformátových dlaždic (24 palců a větších) umisťujte držáky každých 8–12 palců podél okrajů a ve všech rozích. Tento rozestup může být nutné upravit v závislosti na konkrétních vlastnostech dlaždic, stavu podkladu a doporučení výrobce. Pokud máte pochybnosti, raději použijte více držáků než méně, abyste zajistili optimální výsledek.