

घर पर पेशेवर-ग्रेड टाइल स्थापना में निपुणता घर
आधुनिक उपकरणों के साथ टाइल लगाने की कला में क्रांति आ गई है, और समतलीकरण प्लायर्स बेदाग परिणाम प्राप्त करने के लिए एक आवश्यक उपकरण बन गए हैं। चाहे आप अपने बाथरूम का नवीकरण कर रहे हों, अपने रसोई के बैकस्पलैश को अद्यतन कर रहे हों, या नई फर्श लगा रहे हों, समतलीकरण प्लायर्स का सही ढंग से उपयोग करना आपके डीआईवाई प्रोजेक्ट को शौकिया से लेकर पेशेवर गुणवत्ता तक बदल सकता है। यह व्यापक मार्गदर्शिका आपको टाइल लगाने के हर पहलू से अवगत कराएगी, जिससे आपकी सतहें पूरी तरह समतल रहेंगी और आपका पूरा हुआ प्रोजेक्ट समय की परीक्षा में टिकेगा।
टाइल लगाने के लिए आवश्यक उपकरण और सामग्री
मुख्य उपकरण चयन
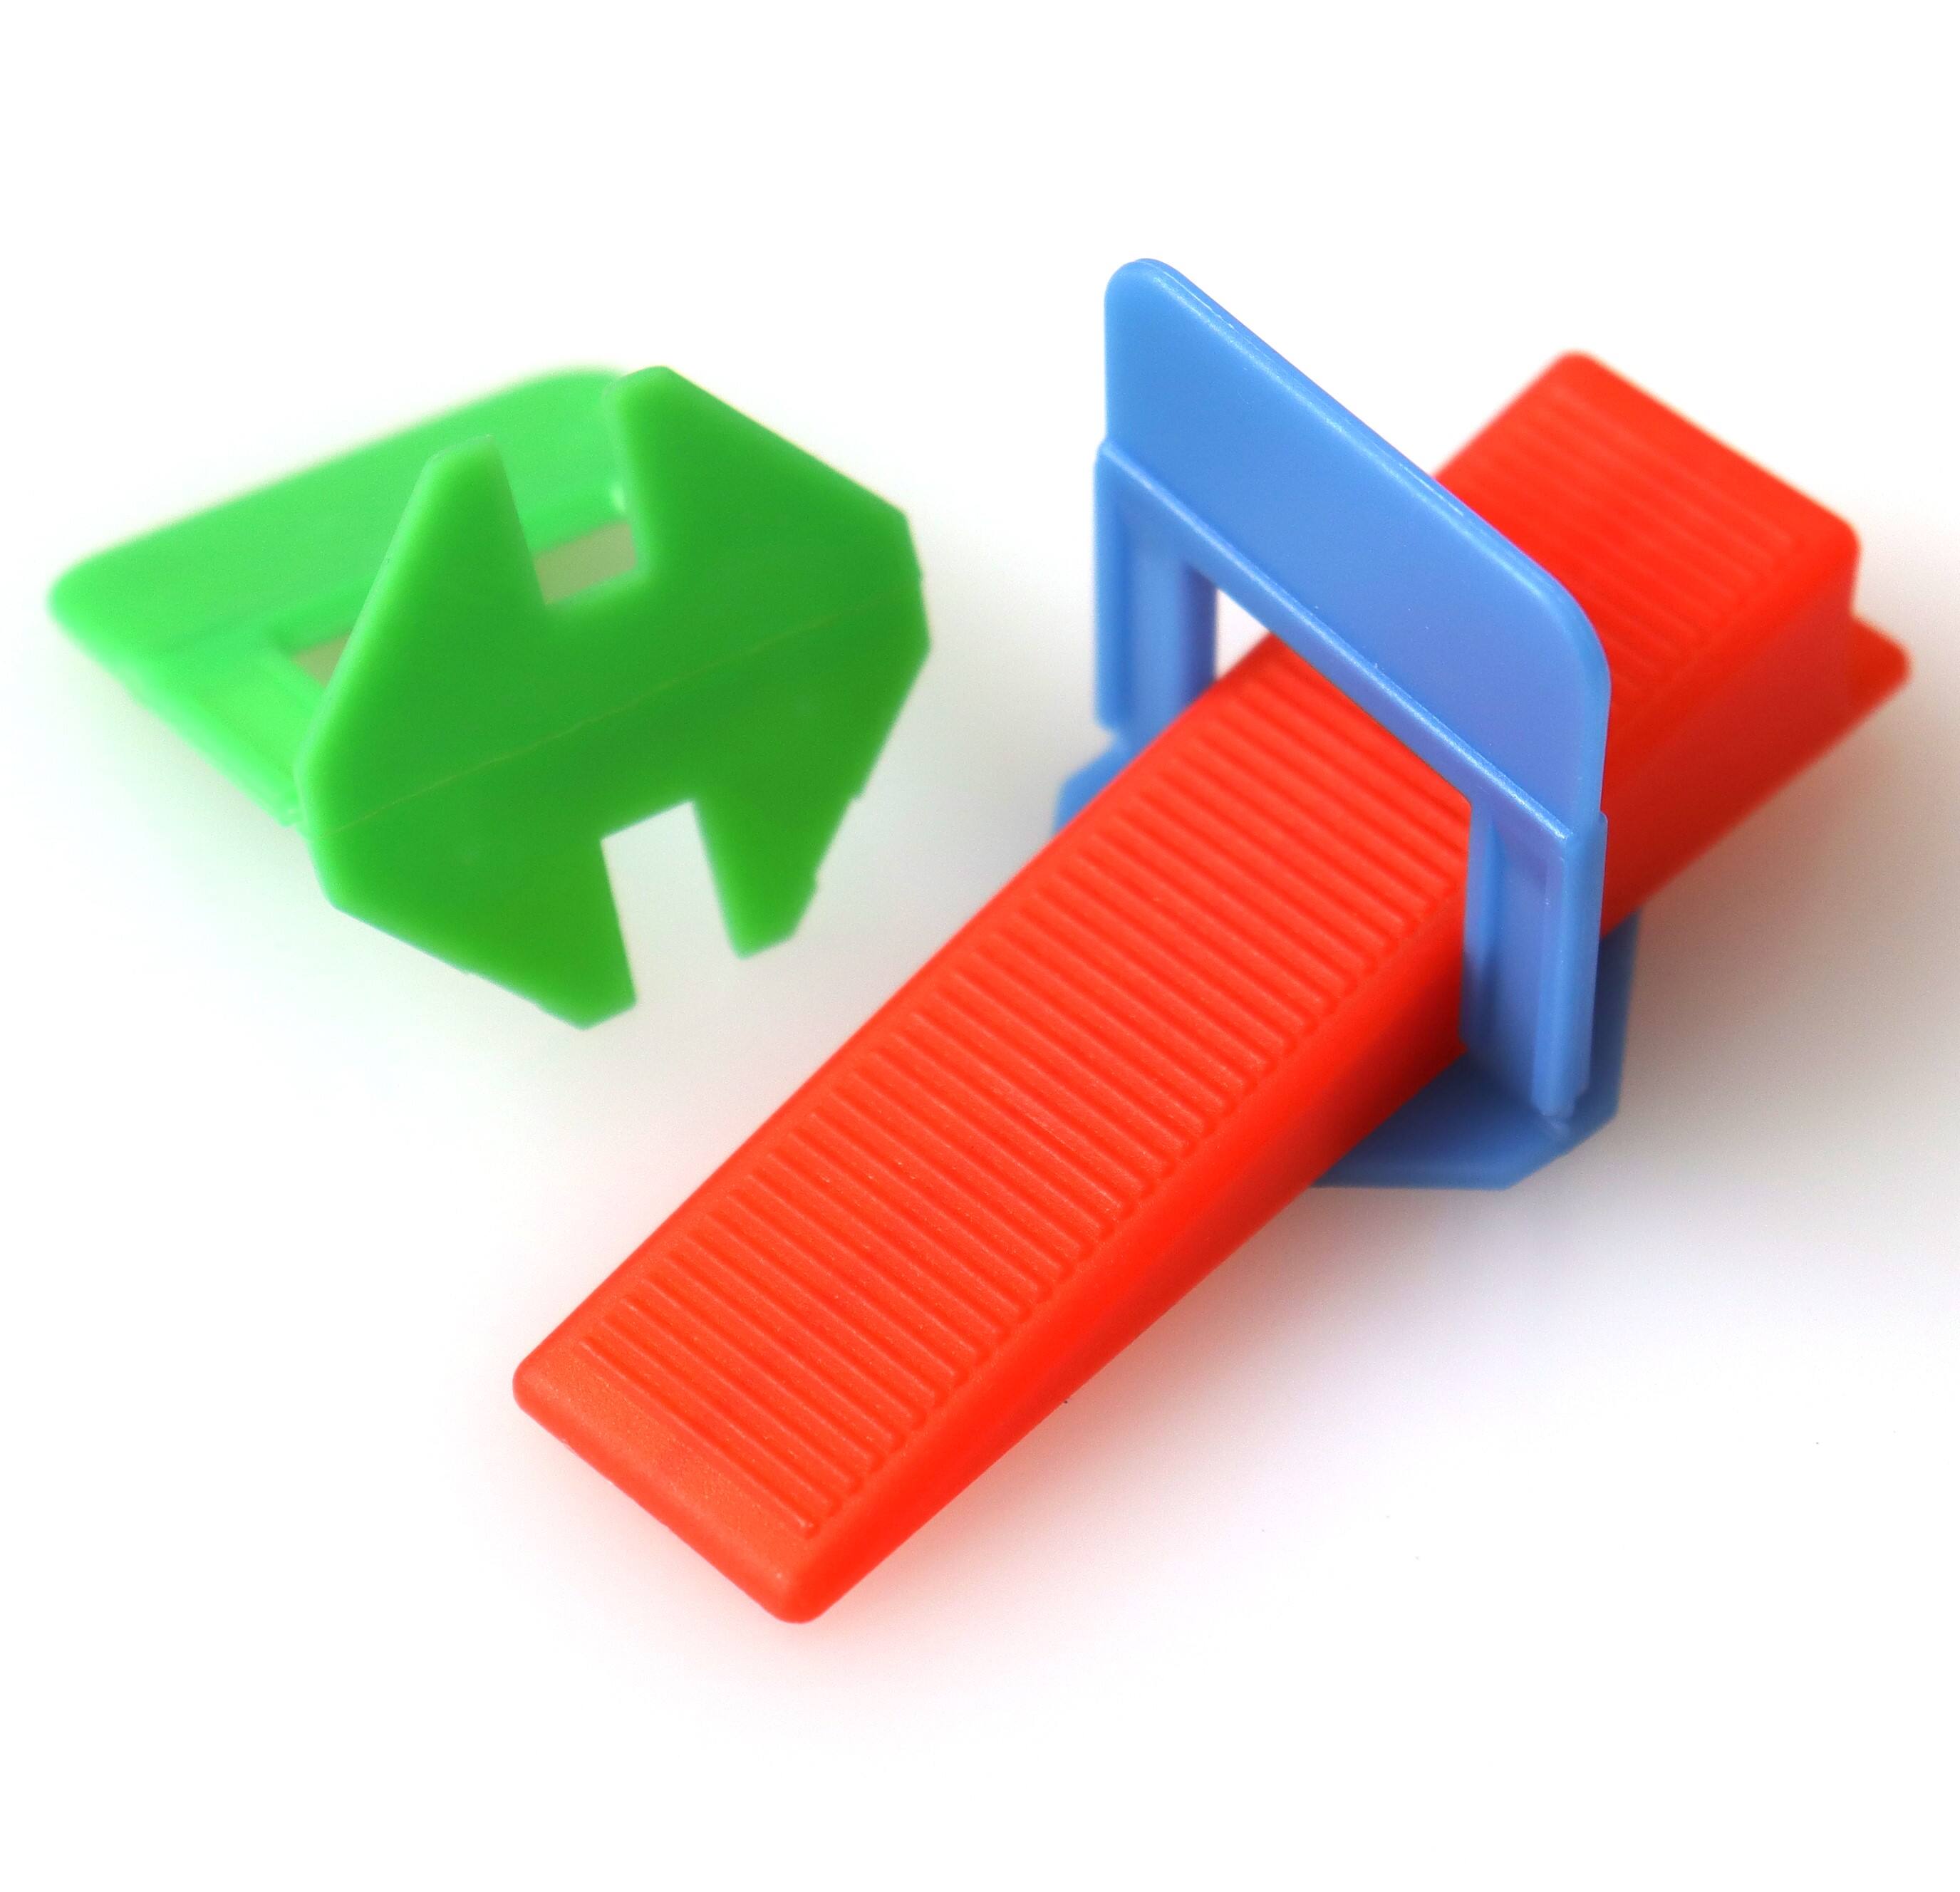
अपने टाइलिंग प्रोजेक्ट में कूदने से पहले, सफलता के लिए सही उपकरण जुटाना महत्वपूर्ण है। आपके उपकरण किट के केंद्र में उच्च-गुणवत्ता वाले लेवलिंग प्लायर्स होने चाहिए, जो सटीक टाइल संरेखण सुनिश्चित करेंगे। आपको टाइल स्पेसर, नॉचयुक्त ट्राउल, लेवल, मापने का टेप, टाइल कटर और मिश्रण बाल्टी की भी आवश्यकता होगी। लेवलिंग प्लायर्स एक टाइल लेवलिंग प्रणाली के साथ संयोजन में काम करते हैं, जिसमें क्लिप और वेज होते हैं जो आसन्न टाइल्स के बीच लिप्पेज को रोकते हैं।
उपयुक्त टाइल लेवलिंग सिस्टम चुनना
सभी नहीं टाइल समतलन प्रणाली समान नहीं होते हैं। अपने चुने हुए लेवलिंग प्लायर्स के साथ संगत ऐसी प्रणालियों की तलाश करें जो आपकी विशिष्ट टाइल मोटाई के अनुकूल हों। अधिकांश प्रणालियों में बेस प्लेट्स शामिल होती हैं जो टाइल के किनारों के नीचे रखी जाती हैं और ढक्कन होते हैं जिन्हें प्लायर्स का उपयोग करके कसा जाता है। प्रीमियम प्रणालियों में अक्सर पुन: उपयोग योग्य घटक होते हैं, जो बड़े प्रोजेक्ट्स के लिए बेहतर मूल्य प्रदान करते हैं।
सरफेस तैयारी की तकनीकें
आधार का मूल्यांकन और सफाई
सफल टाइल स्थापना के लिए उचित सतह तैयारी मूलभूत है। सबस्ट्रेट को पूरी तरह से साफ करके शुरू करें, धूल, मलबे या पुराने चिपकने वाले पदार्थ को हटा दें। लंबे स्तर का उपयोग करके असमान क्षेत्रों की जांच करें, और स्व-समतलीकरण यौगिक के साथ किसी भी महत्वपूर्ण भिन्नता को दूर करें। टाइल स्थापना शुरू करने से पहले सतह पूरी तरह से सूखी होनी चाहिए।
एक आदर्श आधार बनाना
चिपकाव में सुधार और नमी की समस्याओं को रोकने के लिए एक उपयुक्त प्राइमर लगाएं। दीवारों के लिए, सुनिश्चित करें कि वे ऊर्ध्वाधर और संरचनात्मक रूप से मजबूत हों। फर्श पर काम करते समय, सबफ्लोर से टाइलों तक दरारों के संचरण को रोकने के लिए एक अनकपलिंग झिल्ली लगाने पर विचार करें। यह अतिरिक्त कदम आपकी स्थापना के जीवनकाल को काफी बढ़ा सकता है।
टाइल स्थापना प्रक्रिया
अपने कार्य क्षेत्र की व्यवस्था करना
कुशन स्थापना में दक्षता के लिए संगठन महत्वपूर्ण है। अपने मोर्टार के लिए एक समर्पित मिश्रण केंद्र बनाएं और एक साफ़ कटिंग क्षेत्र की व्यवस्था करें। पैटर्न की जांच करने और आवश्यक समायोजन करने के लिए अपने टाइल्स को पहले से ले आएं। यह ड्राई लेआउट संभावित समस्याओं की पहचान करने में मदद करता है और इष्टतम टाइल प्लेसमेंट सुनिश्चित करता है। स्थापना के दौरान आप बार-बार उपयोग करेंगे, इसलिए अपने लेवलिंग प्लायर्स को आसान पहुंच के भीतर रखें।
मोर्टार लगाना और टाइल्स स्थापित करना
अपने मोर्टार को उचित स्थिरता में मिलाएं और उचित नॉच वाले ट्रॉवल का उपयोग करके लगाएं। टाइल्स लगाने से पहले मोर्टार के सूखने को रोकने के लिए छोटे खंडों में काम करें। जैसे ही आप प्रत्येक टाइल लगाते हैं, तुरंत किनारों के साथ लेवलिंग सिस्टम क्लिप्स स्थापित करें। फिर लेवलिंग प्लायर्स का उपयोग वेजेस को डालने और कसने के लिए किया जाता है, जिससे आसन्न टाइल्स के बीच सही संरेखण सुनिश्चित होता है।
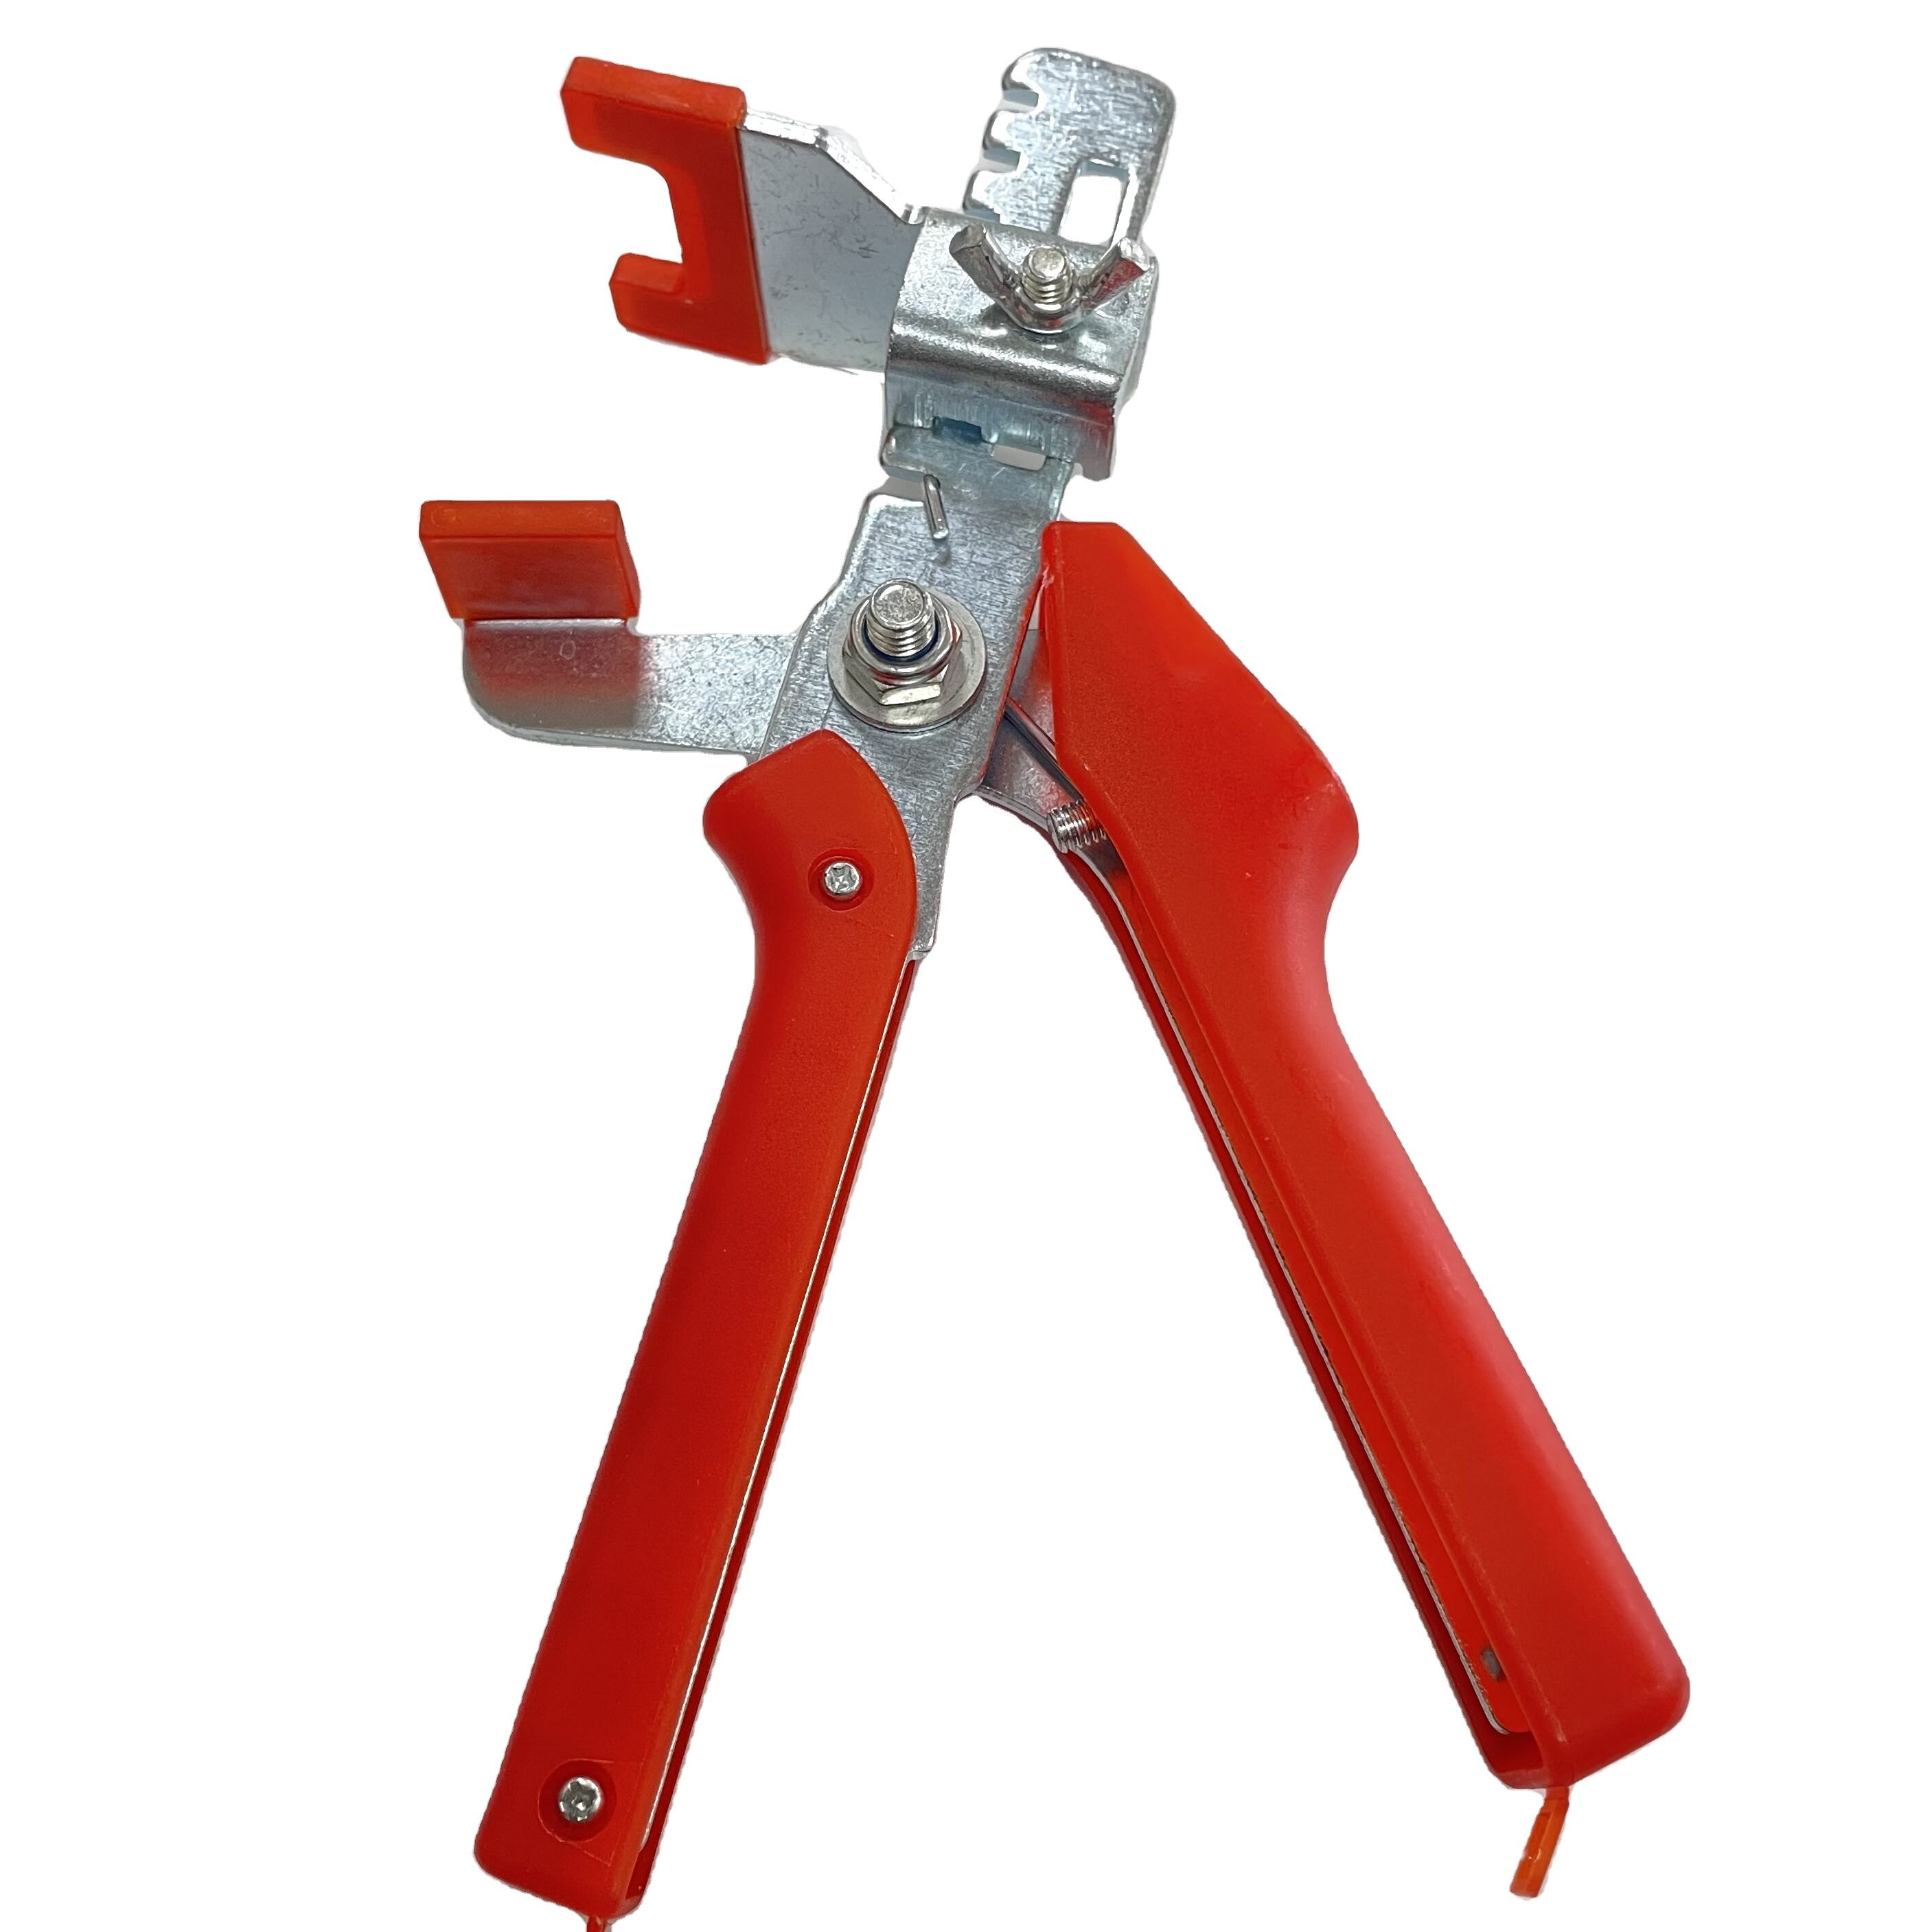
लेवलिंग प्लायर्स तकनीक में निपुणता प्राप्त करना
उचित उपकरण हैंडलिंग
स्तरीकरण प्लायर्स के तंत्र को समझना इष्टतम परिणामों के लिए महत्वपूर्ण है। वेज कसते समय उपकरण को दृढ़ता से पकड़ें और लगातार दबाव बनाए रखें। प्लायर्स को आपकी टाइल की मोटाई के अनुरूप समायोजित किया जाना चाहिए, जिससे अत्यधिक कसाव टाइल्स को नुकसान पहुंचा सकता है या कम कसाव से ठीक से स्तरीकरण नहीं हो पाएगा।
उन्नत स्तरीकरण रणनीतियाँ
बड़े आकार की टाइल्स के लिए, समान दबाव वितरण सुनिश्चित करने के लिए प्रत्येक किनारे के साथ कई क्लिप्स का उपयोग करें। प्राकृतिक पत्थर या नाजुक टाइल्स के साथ काम करते समय, हल्के दबाव डालने के लिए अपनी तकनीक को समायोजित करें। सही तनाव प्राप्त होने पर स्तरीकरण प्लायर्स से एक ध्वनि आनी चाहिए, जो टाइल्स के बीच इष्टतम संरेखण का संकेत देती है।
सामान्य स्थापना चुनौतियाँ
अनियमित जगहों से निपटना
स्तरीकरण प्लायर्स का उपयोग करते समय कोनों, किनारों और अनियमित जगहों को विशेष ध्यान देने की आवश्यकता होती है। इन चुनौतीपूर्ण क्षेत्रों के अनुकूलन के लिए उचित संरेखण बनाए रखते हुए क्लिप्स को रणनीतिक रूप से लगाकर अपने दृष्टिकोण में परिवर्तन करें। कभी-कभी सेटिंग प्रक्रिया के दौरान कस्टम-कट टुकड़ों को अतिरिक्त समर्थन की आवश्यकता हो सकती है।
संरेखण समस्याओं का निवारण
यदि स्तरीकरण प्लायर्स का उपयोग करने के बावजूद आपको लिपेज की समस्या आती है, तो जाँच लें कि क्या आपके क्लिप्स उचित ढंग से स्थित हैं और वेजेस पर्याप्त रूप से कसे हुए हैं। कभी-कभी असमतल सबफ्लोर की स्थिति या गलत मोर्टार लगाने से संरेखण प्रभावित हो सकता है। अपनी स्थापना की गुणवत्ता बनाए रखने के लिए इन समस्याओं का तुरंत समाधान करें।
अक्सर पूछे जाने वाले प्रश्न
स्तरीकरण क्लिप्स को कितने समय तक जगह पर रहना चाहिए?
मोर्टार को ठीक से जमने के लिए कम से कम 24 घंटे के लिए स्तरीकरण क्लिप्स को जगह पर छोड़ दें। ठंडी स्थितियों या बड़े टाइल्स के साथ, आदर्श परिणामों के लिए इस समय को 48 घंटे तक बढ़ा सकते हैं।
क्या सभी प्रकार के टाइल्स के साथ स्तरीकरण प्लायर्स का उपयोग किया जा सकता है?
स्तरीकरण प्लायर्स का उपयोग अधिकांश टाइल प्रकारों के साथ किया जा सकता है, जिनमें सिरेमिक, पोर्सिलेन और प्राकृतिक पत्थर शामिल हैं। हालाँकि, सुनिश्चित करें कि आपकी चुनी गई स्तरीकरण प्रणाली आपकी टाइल की मोटाई और सामग्री विशिष्टताओं के साथ संगत है।
स्थापना के बाद स्तरीकरण क्लिप्स को हटाने का सबसे अच्छा तरीका क्या है?
एक बार मोर्टार पूरी तरह से ठीक हो जाने के बाद, टाइल की सतह के समानांतर दिशा में रबर मैलेट से वेज को प्रहार करके क्लिप्स को हटा दें। आधार प्लेट अपने डिज़ाइन किए गए टूटने के बिंदु पर साफ़ तरीके से टूट जाएंगी, जिससे स्तरीकरण प्रणाली के कोई दृश्यमान प्रमाण नहीं रहेंगे।