

가정에서 프로급 타일 시공 완성하기 집
타일 시공 기술은 현대적인 도구들로 인해 혁신되었으며, 레벨링 플라이어는 완벽한 결과를 얻기 위해 필수적인 도구가 되었습니다. 욕실을 리모델링하거나 주방 벽면을 업데이트하거나 새로운 바닥재를 설치하든, 레벨링 플라이어를 올바르게 사용하는 방법을 이해하면 DIY 프로젝트의 품질을 아마추어 수준에서 전문가 수준으로 바꿔놓을 수 있습니다. 이 포괄적인 가이드는 타일 시공의 모든 측면을 안내하여 표면이 완전히 수평이 되고 마무리된 작업이 오랜 시간 동안 견고하게 유지되도록 도와드립니다.
타일 시공을 위한 필수 도구 및 자재
핵심 장비 선택
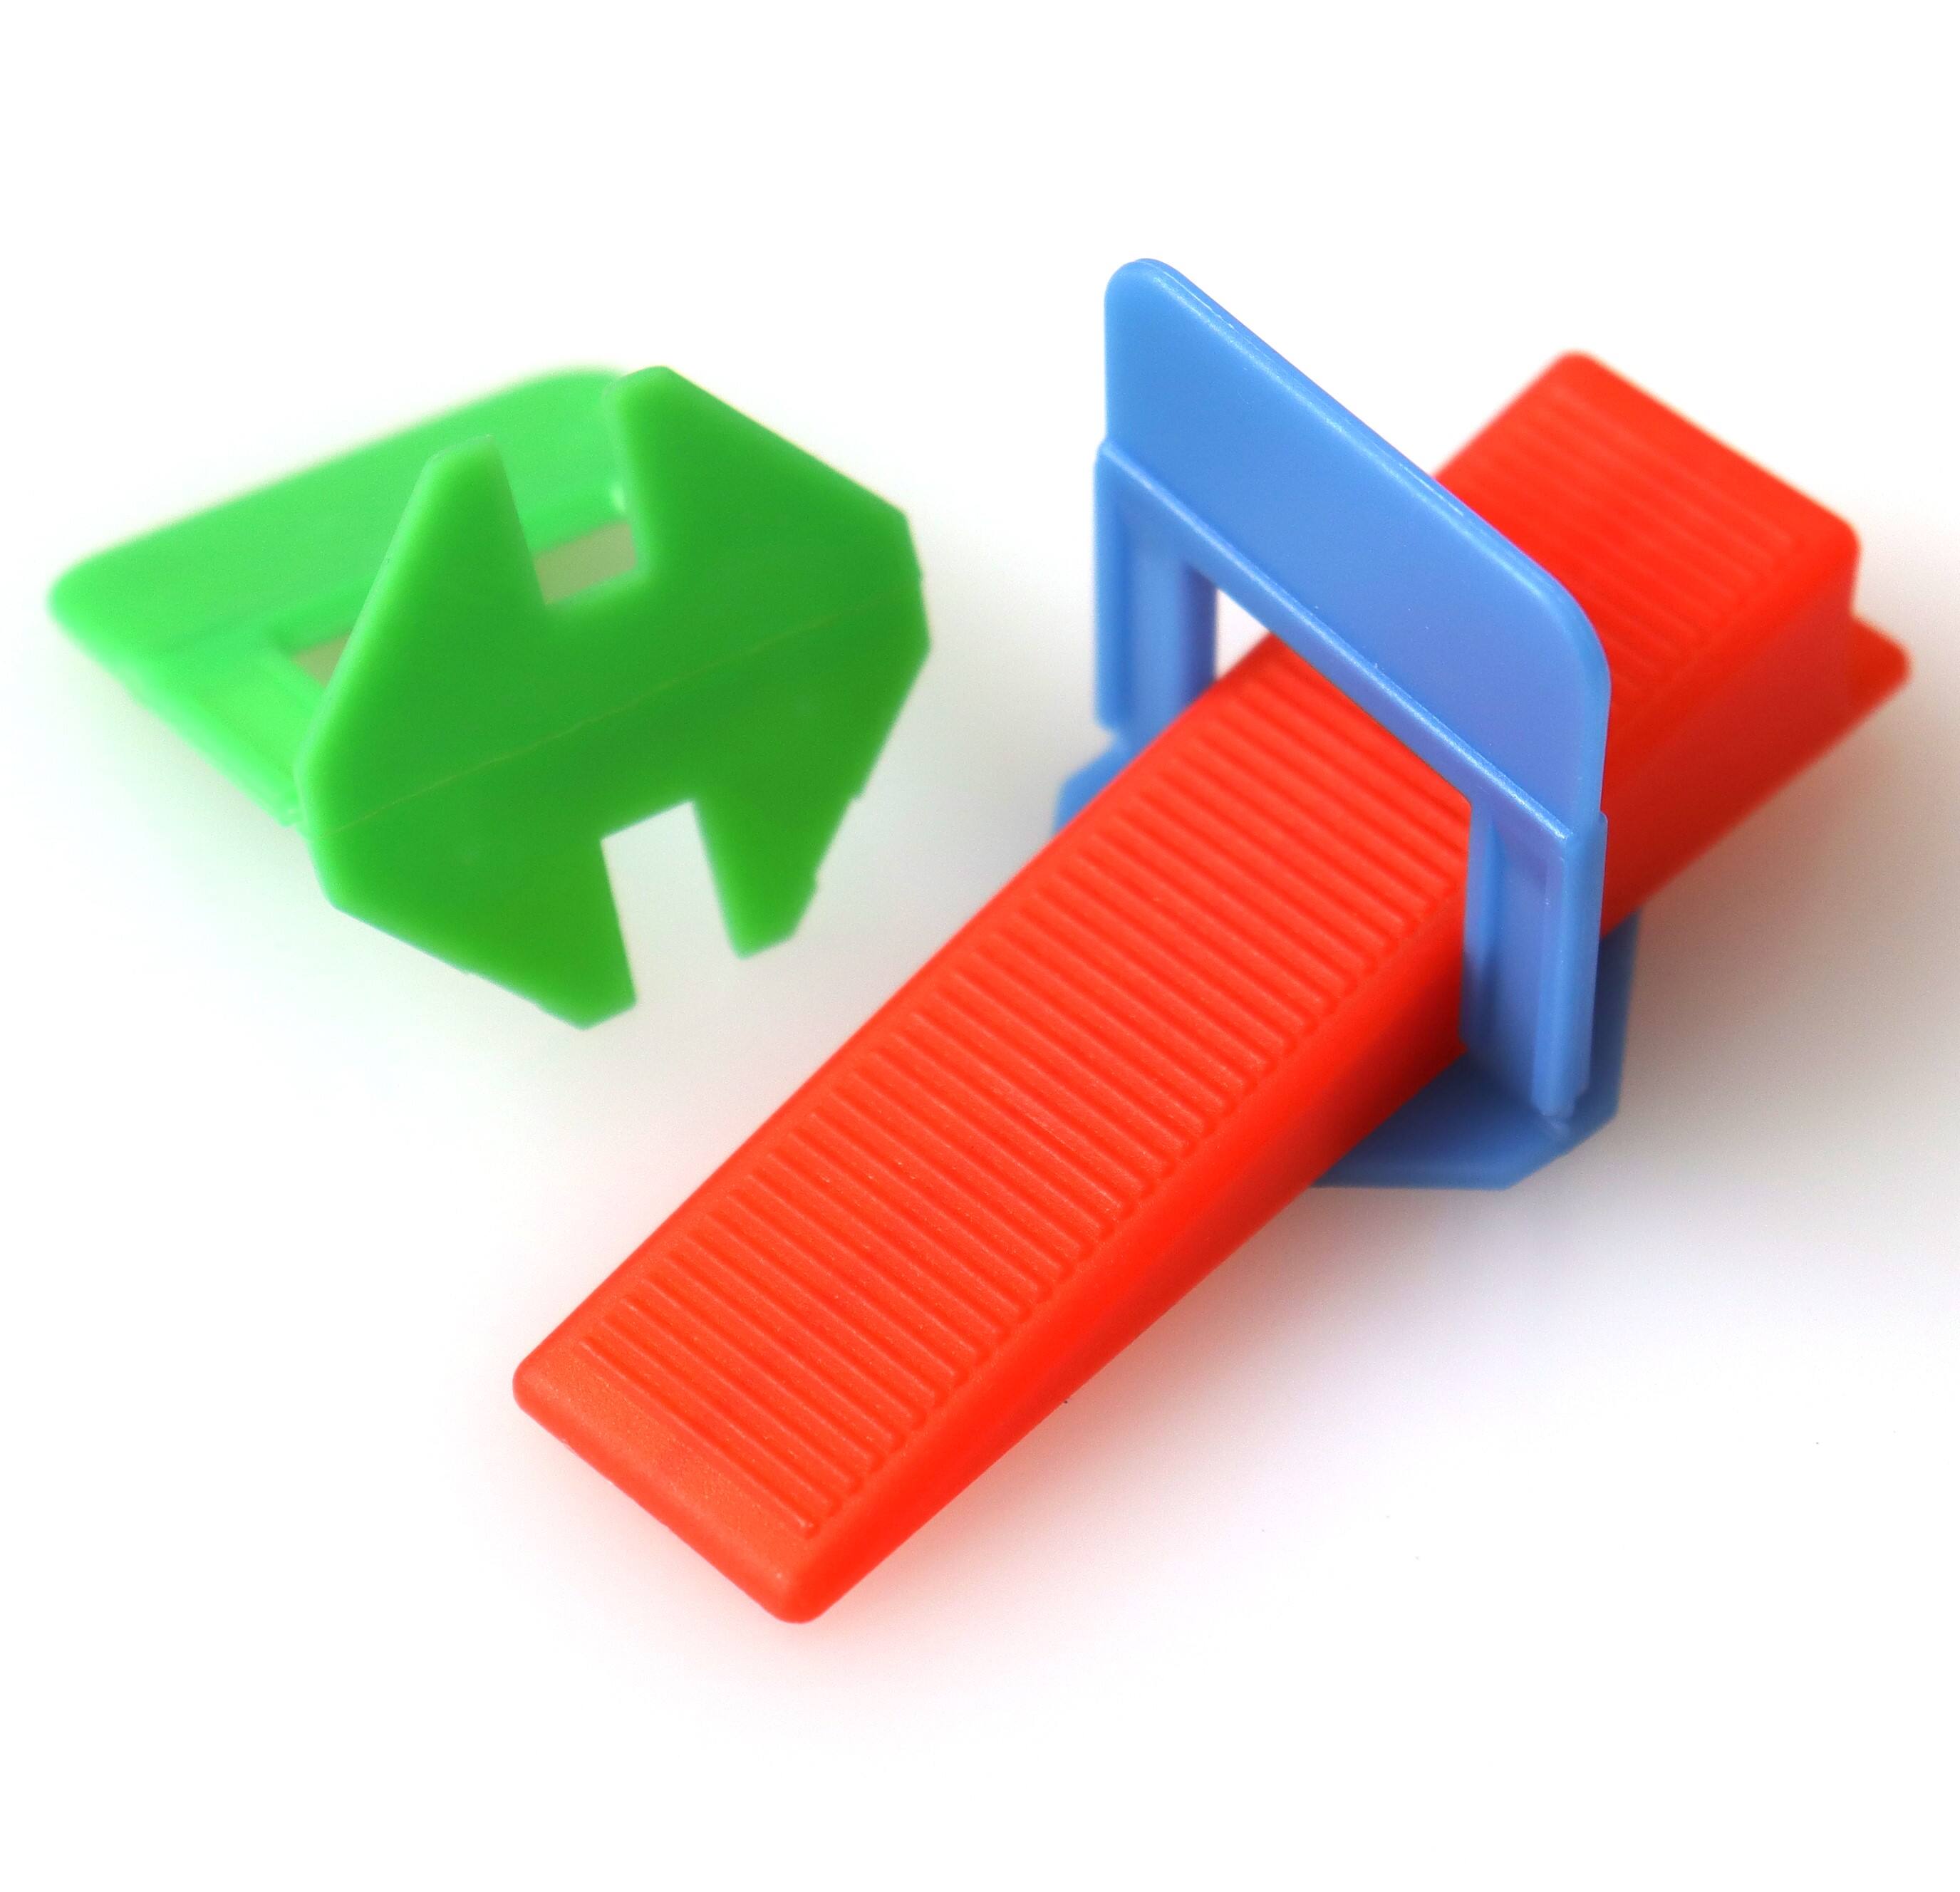
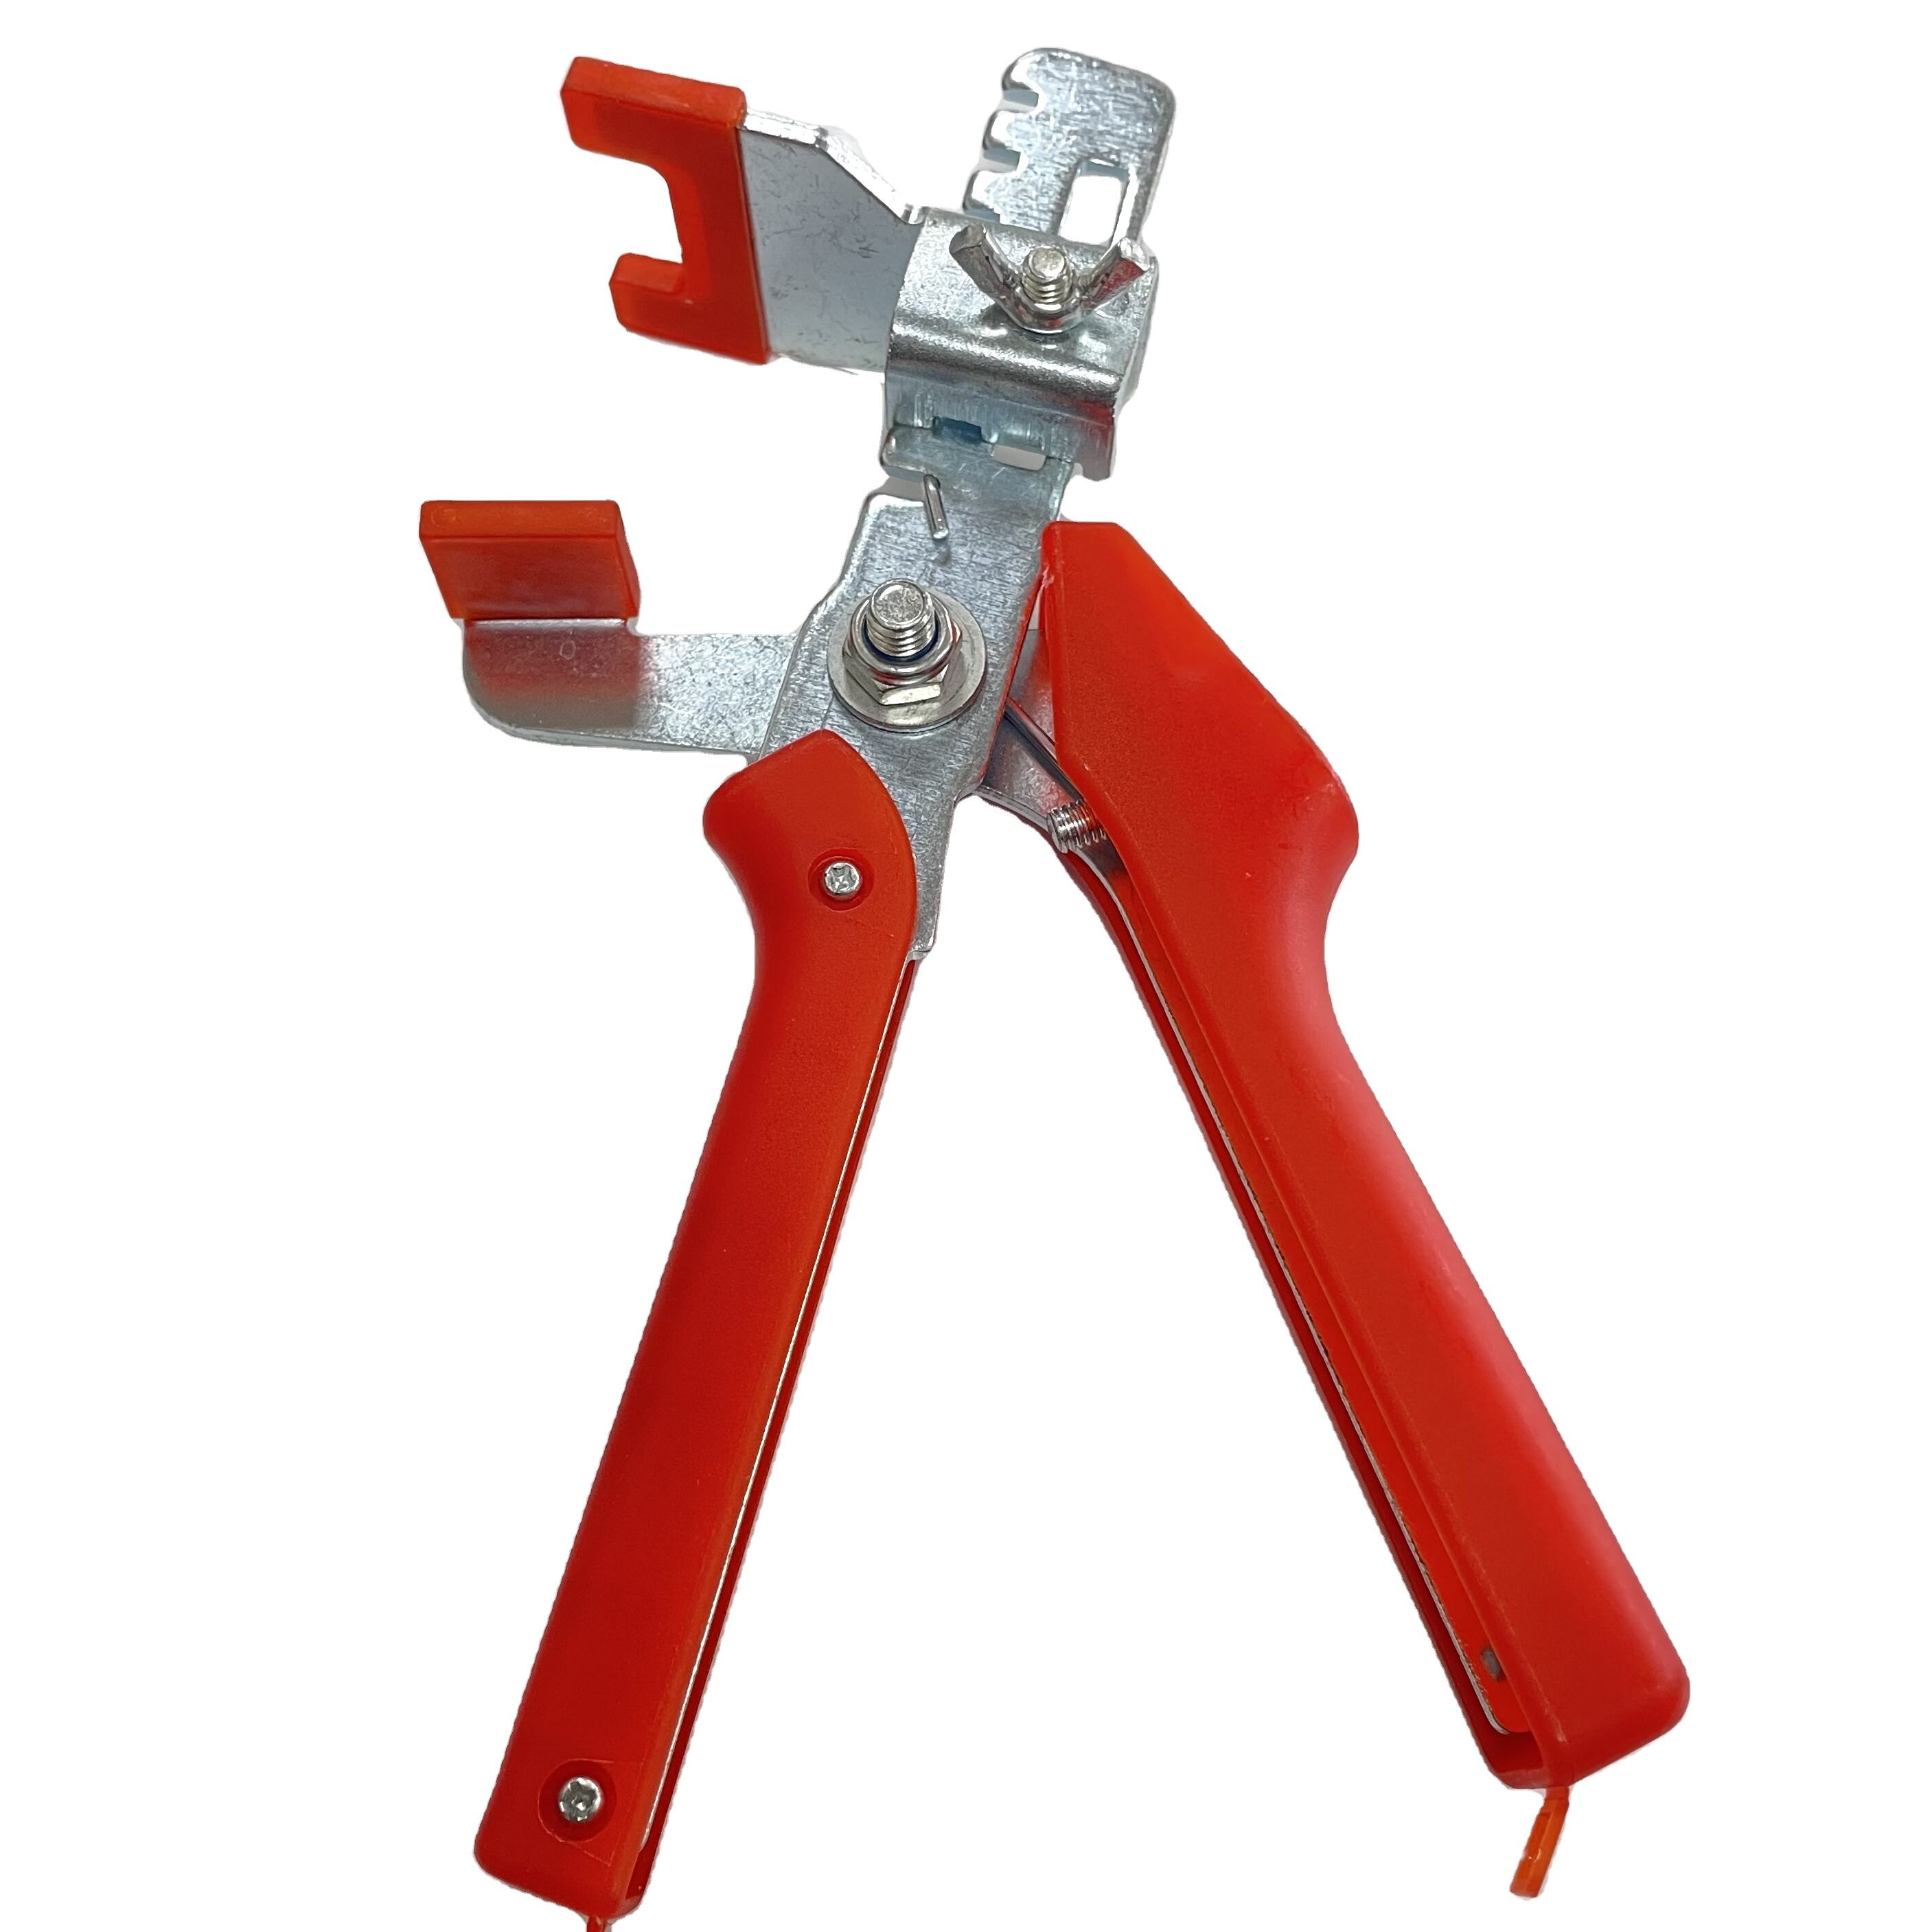
타일 시공을 시작하기 전에 성공적인 작업을 위해 올바른 도구를 준비하는 것이 중요합니다. 도구 세트의 중심에는 고품질의 레벨링 플라이어가 있어야 하며, 이를 통해 타일의 정확한 정렬이 가능해집니다. 또한 타일 스페이서, 톱니 모양의 흙손, 수평계, 줄자, 타일 절단기, 혼합용 양동이 등도 필요합니다. 레벨링 플라이어는 클립과 웨지로 구성된 타일 레벨링 시스템과 함께 사용되며, 인접한 타일 간의 높이 차이(립페이지)를 방지하는 데 도움을 줍니다.
적절한 타일 레벨링 시스템 선택하기
모든 것은 아닙니다 타일 레벨링 시스템 평등하게 창조되었습니다. 선택 한 평준화 과 호환 되는 시스템 을 찾아라. 대부분의 시스템에는 타일 가장자리 아래에 자리 잡은 기판판과 을 사용하여 단단히 묶는 모자가 있습니다. 프리미엄 시스템은 종종 재사용 가능한 구성 요소를 갖추고 있으며, 더 큰 프로젝트에 더 나은 가치를 제공합니다.
표면 준비 기술
기초면 평가 및 청소
타일 시공을 성공적으로 수행하려면 적절한 표면 준비가 필수적입니다. 기초 재료를 철저히 청소하여 먼지, 이물질 또는 오래된 접착제를 모두 제거하세요. 긴 레벨기를 사용하여 불균형한 부분을 점검하고, 셀프레벨링 혼합제로 큰 높이 차이를 보정하세요. 타일 시공에 착수하기 전에 표면이 완전히 마른 상태여야 합니다.
완벽한 기반 만들기
접착력 향상과 습기 문제 방지를 위해 적절한 프라이머를 도포하세요. 벽의 경우 수직 상태와 구조적 안정성을 확인해야 합니다. 바닥 작업 시에는 언커플링 막을 설치하여 하부 바닥의 균열이 타일로 전달되는 것을 방지하는 것이 좋습니다. 이러한 추가 작업은 시공 수명을 상당히 연장시킬 수 있습니다.
타일 시공 과정
작업 공간 설정
타일 시공의 효율성을 위해서는 철저한 조직화가 핵심입니다. 모르타르를 혼합할 전용 작업대를 마련하고 깔끔한 절단 공간을 확보하세요. 타일을 미리 배치하여 패턴을 확인하고 필요한 조정을 하세요. 이러한 드라이 레이아웃은 잠재적 문제점을 파악하는 데 도움이 되며, 최적의 타일 배치를 보장합니다. 시공 중 자주 사용하게 될 레벨링 플라이어스는 손이 쉽게 닿는 위치에 준비해 두세요.
모르타르 도포 및 타일 시공
모르타르를 적절한 농도로 혼합한 후 해당 용도에 맞는 이지선형 흙손을 사용하여 도포하세요. 모르타르가 마르기 전에 타일을 시공할 수 있도록 소규모 구역 단위로 작업하세요. 각 타일을 설치하는 즉시 가장자리에 레벨링 시스템 클립을 장착하세요. 이후 레벨링 플라이어스를 사용해 웨지를 삽입하고 조여 인접한 타일들 사이의 정확한 정렬을 확보하세요.
레벨링 플라이어스 기술 숙지하기
올바른 공구 취급 방법
레벨링 플라이어의 작동 원리를 이해하는 것은 최상의 결과를 얻기 위해 중요합니다. 웨지를 조일 때 도구를 단단히 잡고 일정한 압력을 유지하세요. 타일 두께에 맞게 플라이어를 조정하여 과도한 조임으로 인한 타일 손상이나 부족한 조임으로 인해 제대로 레벨링되지 않는 상황을 방지해야 합니다.
고급 레벨링 전략
대형 타일의 경우 각 모서리에 여러 개의 클립을 사용하여 균일한 압력 분포를 보장하세요. 천연석 또는 섬세한 타일 작업 시에는 더 부드러운 압력을 가하도록 기술을 조정해야 합니다. 레벨링 플라이어는 적절한 장력이 확보되면 ‘딸깍’ 소리가 나야 하며, 이는 타일 간 최적의 정렬 상태를 나타냅니다.
일반적인 설치 문제
불규칙한 공간 처리
레벨링 플라이어를 사용할 때 모서리, 가장자리 및 비정형 공간은 특별한 주의가 필요합니다. 이러한 까다로운 부분을 보완하면서 올바른 정렬을 유지하기 위해 클립을 전략적으로 배치하여 작업 방식을 조정하세요. 때때로 맞춤 절단한 타일 조각이 시공 과정에서 추가 지지대를 필요로 할 수 있습니다.
정렬 문제 해결
레벨링 플라이어를 사용했음에도 불구하고 타일 간 높이 차이(립페이지)가 발생한다면, 클립이 올바르게 위치되었는지와 웨지를 충분히 조였는지 확인하세요. 가끔 바닥면의 불균형이나 모르타르 도포 불량이 정렬에 영향을 줄 수 있습니다. 설치 품질을 유지하려면 이러한 문제를 즉시 해결해야 합니다.
자주 묻는 질문
레벨링 클립은 얼마나 오래 그대로 두어야 하나요?
모르타르가 제대로 굳어들 수 있도록 레벨링 클립은 최소 24시간 동안 그대로 두어야 합니다. 기온이 낮거나 타일 크기가 큰 경우에는 최상의 결과를 위해 48시간까지 시간을 연장하는 것이 좋습니다.
레벨링 플라이어는 모든 종류의 타일에 사용할 수 있나요?
레벨링 플라이어는 세라믹, 포세린, 천연석 등 대부분의 타일 유형과 함께 사용할 수 있습니다. 그러나 선택한 레벨링 시스템이 사용하는 타일의 두께 및 재질 사양과 호환되는지 확인하십시오.
시공 후 레벨링 클립을 제거하는 가장 좋은 방법은 무엇인가요?
모르타르가 완전히 경화된 후 고무망치를 사용하여 타일 표면과 평행한 방향으로 웨지를 가볍게 두드려 클립을 제거합니다. 베이스 플레이트는 설계된 파단 지점에서 깔끔하게 떨어져 나가며, 레벨링 시스템의 흔적을 남기지 않습니다.