

Мэргэжлийн хавтангийн түвшний системүүдийн үндсэн гарын авлага
Туршлагатай DIY туслах хүмүүс ч гэсэн идеал түвшинд тавиур суурилуулах нь хэцүү байдаг. Тавиур түвшинжүүлэх клип ба зайгийн барьцагчид мэргэжилтнүүд болон өрхүүд тавиур суурилуулах ажлыг хэрхэн хандаж буйг хувьсгалжуулсан. Эдгээр шинэлэг хэрэгслүүд нь тавиурнуудын хооронд нарийвчлалтай тааруулга ба тогтмол зайг хангаж, мэргэжилтнүүдийн ажилтай тэнцэх гэмгүй дуусгах үр дүнд хүргэдэг. Зөв тавиур түвшинжүүлэх системийг хэрхэн сонгох, ашиглахыг ойлгох нь дунд зэргийн үр дүн болон гайхамшигтай, удаан хугацаагаар үргэлжлэх тавиур суурилуулалтын хоорондох ялгааг тодорхойлно.
Тайлбар тэнцвэржүүлэх системүүдийн тухай ойлголт
Бүрэлдэхүүн хэсгүүд ба механизм
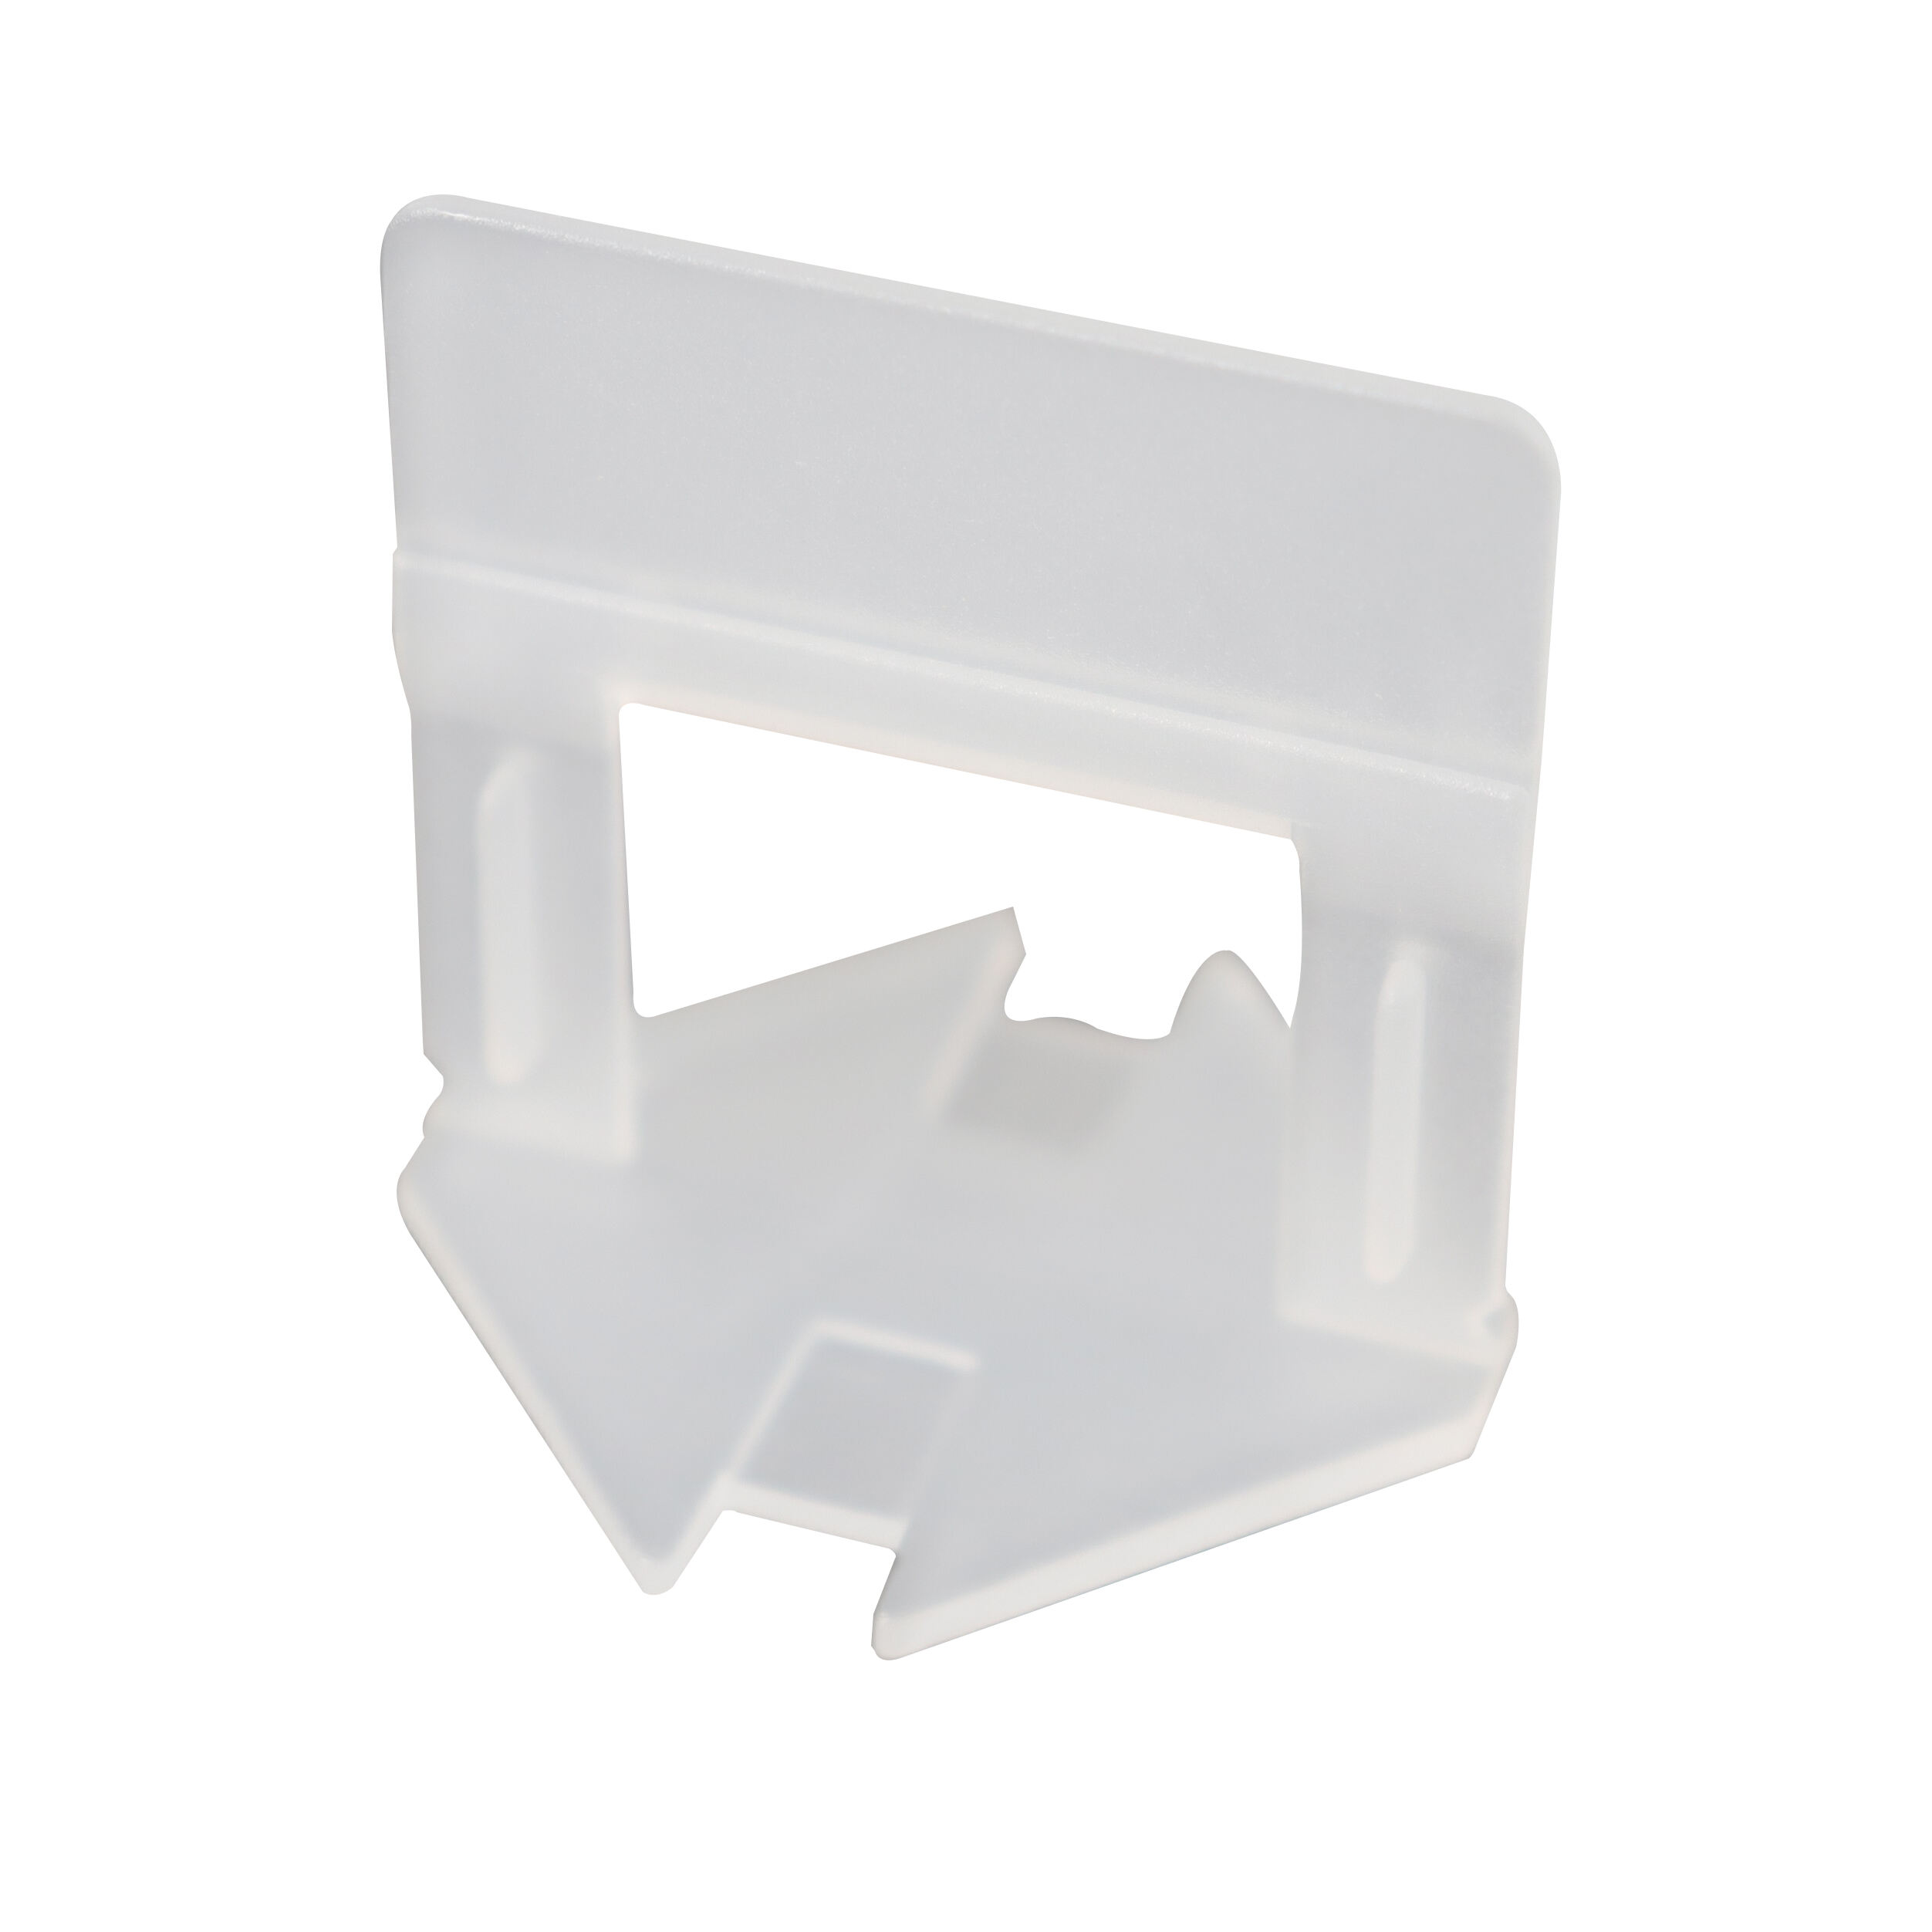
Орчин үеийн тахилгат систем нь хэд хэдэн гол бүрэлдэхүүн хэсгээс бүрддэг. Дуртай клипүүд эсвэл зайлах нь ойрхон тавилганы доор байрладаг бол даралт үүсгэх, тохиролцоог хадгалахын тулд дээшээс хаалгыг эсвэл хаалгыг оруулдаг. Тус клипүүд нь тод хэмжилт хөтлөгч, хагас хоорондын хоорондын хоорондоо тогтмол зайг хангах байнгын зарна. Ихэнх систем нь 1/8 дюймээс 3/4 дюйм хүртэл товчтой тавилгатай ажиллах зориулалттай бөгөөд тэдгээрийг порцелан, керамик, байгалийн чулуу зэрэг янз бүрийн материалын хувьд олон талт ашиглах боломжтой болгодог.
Цонхны түвшинд хүргэх сэлбэгний механизм нь хальсыг сааруулахын тулд механик даралтад тулгуурладаг. Нэмэлт нь хуурайч, хамар нь цамхаг нь тогтвортой байлгаж, хуурайшилт үргэлжлэх үедээ бүрэн тэнцвэртэй байхын тулд хамар нь хатуу байдаг.
Мэргэжлийн түвшинд нь хүргэх системийн давуу тал
Хавтангийн түвшний хавхлагыг ашигласнаар зөвхөн устай харьцуулахад олон давуу талтай. Тэд суулгах хугацааг ихэд багасган, нарийвчлал, нягтруулалтыг сайжруулдаг. Энэ систем нь том хэмжээтэй хавтангууд шилжих эрсдэлийг илүү ихтэй байдаг учраас хатуурах явцад хавтангууд шилжихээс сэргийлдэг. Мэргэжлийн түвшний системүүд мөн ноцтой алдаа, дахин дуудлага болох эрсдэлийг багасгадаг тул ямар ч DIY төслийн хувьд үнэ цэнэтэй хэрэгсэл болдог.
Нөгөө чухал давуу тал бол суурилуулалтын эцсийн харагдац сайжрах явдал юм. Хатуурах явцад нарийвчилсан эгнээг хадгалснаар хавтангуудын хооронд зүгээр шилжихийг хангаж, илүү гоё, мэргэжлийн харагдац үүсгэдэг. Гэрэлтэй газруудад энэ нарийвчлал нь ялангуяа чухал бөгөөд жижиг л хазайлт нь ил тод сүүдэр үүсгэж чаддаг.
Тохиромжтой түвшний системийг сонгох
Удамшилтай материалуудын хамгийн том хослол
Янз бүрийн тайлны материал, хэмжээ нь тайлны түвшинжүүлэх тодорхой төрлийн цавуур шаарддаг. Жишээ нь, байгалийн чулуун тайлнуудын жигд бус ирмэгийг тооцож өргөн зай авах шаардлагатай бол, том хэмжээтэй порцелан тайлнууд суурилуулалт хийх үед хөдөлгөөнийг саатуулахын тулд илүү хүчтэй цавуур хэрэгтэй байдаг. Таны сонгосон тайлын зузаан нь аль түвшинжүүлэх систем хамгийн сайн ажиллахыг тодорхойлоход чухал үүрэг гүйцэтгэдэг.
Марган, шилэн тайл зэрэг мэдрэг материалтай ажиллах үед тайлын гадаргууг муудууцах эсвэл тэмдэг үлдээхгүй цавуурыг сонгох нь маш чухал юм. Зарим үйлдвэрлэгчид ийм төрлийн ашиглалтын тулд зориулан илүү зөөлөн материал эсвэл хамгаалалтын давхаргатай онцгой цавууруудыг санал болгодог. Таны сонгосон систем тайлын материаль, зузаантай хосмог байгаа эсэхийг төслөө эхлэхээс өмнө заавал шалгана уу.
Төслийн хэмжээний шаардлага
Таны хаялтын төслийн хэмжээ нь шаардлагатай засварын хавтсны төрөл, тоо хэмжээг тодорхойлно. Их хэмжээний төслүүд нь цаг хугацаанд нийцэж, зардал хэмнэх боломжтой, илүү бат бөх, дахин ашигладаг системүүдээс болгоомжтой байж болно. Жижиг хэмжээний өөрөө хийх төслүүдийн хувьд устгахад зориулсан хавтснууд илүү практик бөгөөд үр дүнтэй байж болно. Тавих гэж буй хавтангуудын тоог авч үзээд, үйлдвэрлэгчийн зөвлөмжид суурилан шаардлагатай хавтсны тоо хэмжээг тооцоолно.
Мөн оройтууд эсвэл хавтангуудын олон хэмжээтэй загваруудыг агуулсан нарийн төвөгтэй суурилуулалт нь янз бүрийн нугалаасны өргөн, эгнээний бэрхшээлийг тохируулахын тулд өөр өөр төрлийн хавтснуудыг шаардаж болно. Хавтсны янз бүрийн хэмжээ, загварыг гар дээрээ бэлэн байлгах нь гарч ирж болзошгүй суурилуулалтын бэрхшээлийг шийдвэрлэхэд тусална.
Инсталляцын хамгийн сайн практик
Бэлтгэл ба төлөвлөгөөний зураглал
Цэгээн дээрх амжилттай суурилуулалт нь зөв бэлтгэл болон төлөвлөлтөөс эхэлдэг. Аливаа цэгээн дээрх түвшинжүүлэх хавхарга суурилуулахын өмнө суурь хэсэг цэвэр, тэгш байрласан, зөв бэлтгэгдсэн эсэхийг шалгана уу. Огтлолтууд болон шилжилтийг тооцож, цэгээний байршилд төлөвлөгөө гаргахад цаг зарцуулна уу. Тус тусын төслөөс дамжуулан шугамлаг шугамыг тэмдэглэж, суурилуулалтыг удирдан чиглүүлж, бүх төслийн туршид шугамын зураасыг шулуун байлгахад тусална.
Цэгээний хэмжээ болон загварын дагуу шаардлагатай цэгээн дээрх түвшинжүүлэх хавхаргын тоог тооцоолно. Ерөнхийдөө том цэгээнүүд нь ирмэгний ялгааг үр дүнтэй арилгахын тулд нэг цэгээнд илүү олон хавхарга шаарддаг. Суурилуулалтын бүх хэсэгт тогтмол зай, дэмжлэгийг хангахын тулд хавхарга байрлуулах системтэй аргачлал боловсруулна уу.
Ашиглалтын Техник
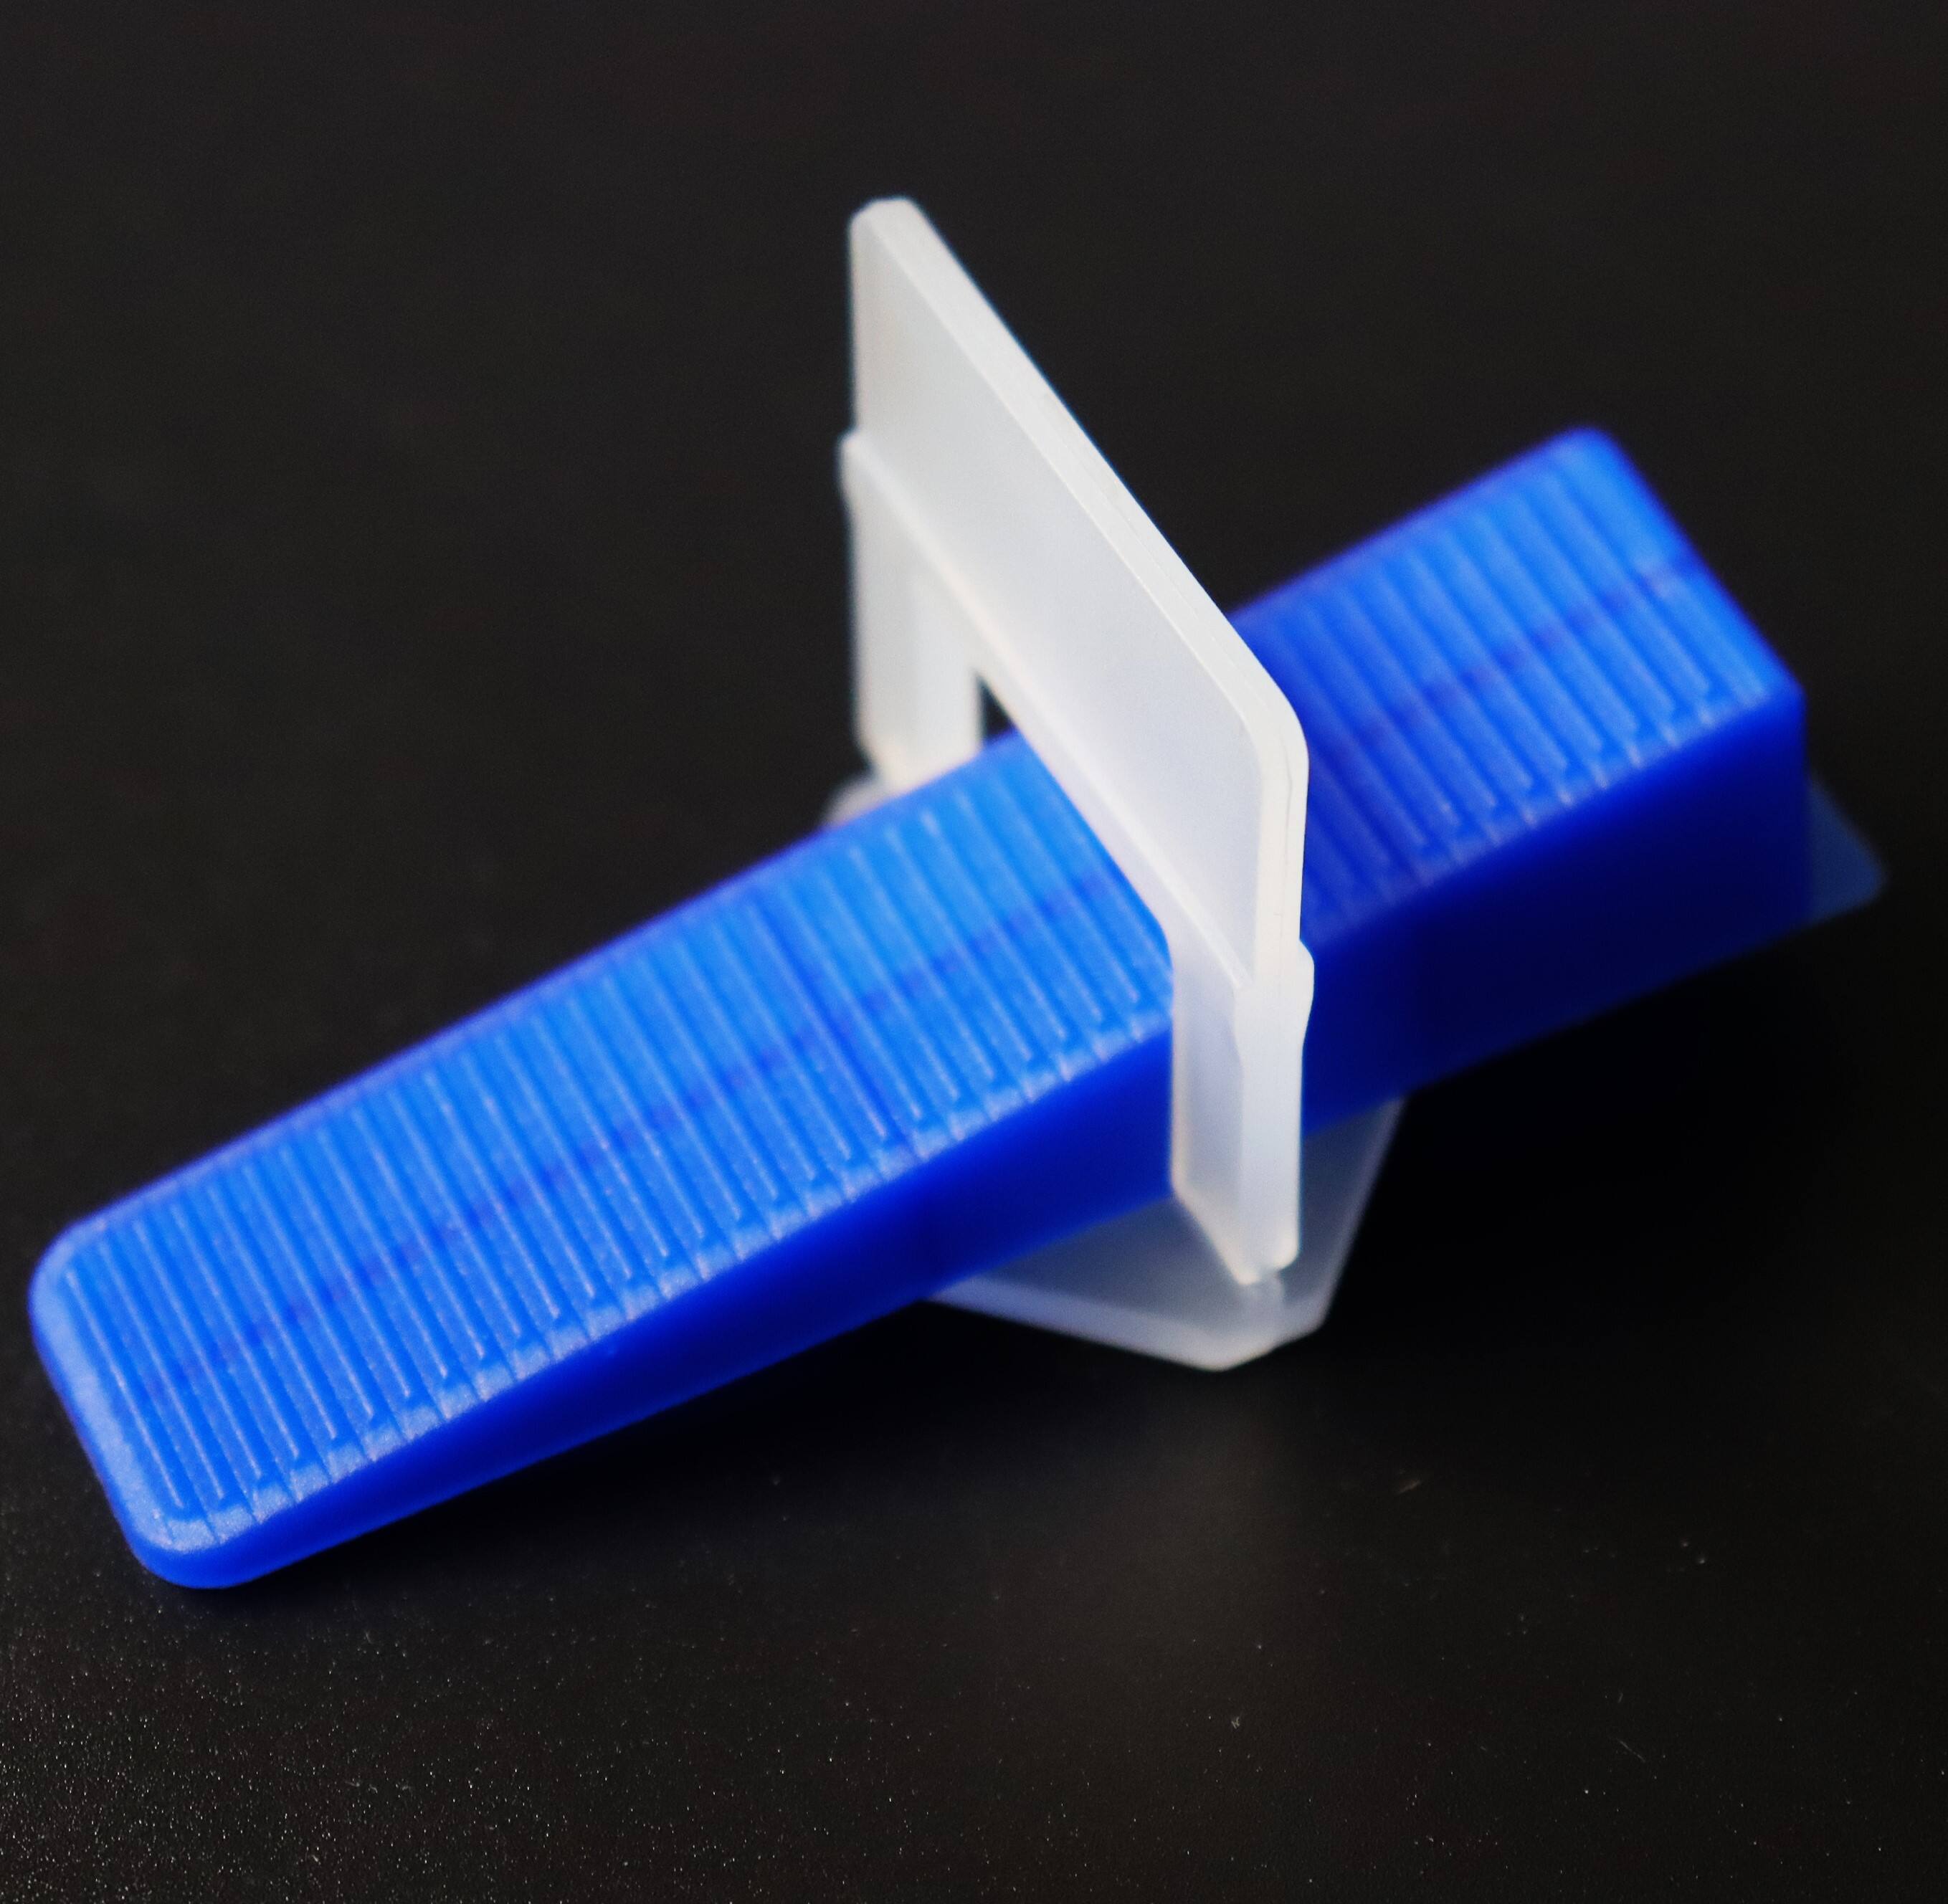
Хавтангийн түвшний хавтсийг зөв хэрэглэх нь илүү дээд үр дүн гаргахад маш чухал юм. Тохиромжтой хэмжээтэй шүрэнцэрийг ашиглан мортарыг суурин дээр тараана уу. Эхний хавтанг тавиад, дараачийн хавтангууд огтлолцох ирмэг дагуу хавтсыг суулгаарай. Дараагийн хавтанг хавтсан дээр тавьж, бүрэн суусан эсвэл түвшинд нь байгаа эсэхийг шалгаарай. Хослог болон тагийг суулгаж, зөвлөмжөөр тодорхойлсон даралт хүртэл цангах болгоно уу – илүү их цангах нь хавтанг муруй болгох эсвэл системийг гэмтээх боломжтой.
Энэ үйл явцыг үргэлжлүүлж, хавтангуудын хооронд болон том талбайд түвшингээ тогтмол шалгана уу. Резинэн чийгийг ашиглан хавтанг жижигхэн цохиж, мортарын хуванцартай тэнцвэртэй харьцахыг хангана уу. Зарцуулах хугацаа нь ерөнхийдөө 24-48 цаг байдаг боловч, орчны нөхцөл ба мортарын төрлөөс хамаарч хавтсыг санах хугацааг өнгөрсний дараа авч хаяна уу.
Засварын үйл ажиллагаа болон алдаануудыг засах
Түгээмэл тохиолдох суурилуулалтын бэрхшээлүүд
Хавтангийн түвшний хавтснуудыг ашиглаж байгаа ч суурилуулалтын үед зарим бэрхшээл гарч болзошгүй. Эцсийн дүнд нь хавтангийн эгнэлтэнд нөлөөлөх суурь орчны тэгш бус байдлаас болон нэмэлт бэлтгэлийн ажил шаардагдах болно. Холбогчийг хатуурах үеийн температурын хэлбэлзэл нь цементийн хатуурах хугацаанд болон түвшний системийн үйл ажиллагаанд сөргөөр нөлөөлж болно. Эдгээр боломжит асуудлыг урьдчилан мэдэж байвал тэдгээрийг асуудал болохоос өмнө тохиромжтой шийдэлтэй байхад тусална.
Түвшний хавтсыг ашиглаж байгаа боловч хавтангууд эгнэлтгүй харагдаж байвал зөв байршуулалт ба таталтыг шалгана уу. Зарим тохиолдолд, хавтсыг дахин тохируулах эсвэл нэмэлт дэмжлэгийн цэгүүдийг нэмэх нь цемент хатуурч эхлэхээс өмнө эгнэлтийн асуудлыг шийдвэрлэх боломжтой. Суурилуулалт явагдах үед хугарч эсвэл буруу ажиллаж болзошгүй хавтсыг солихын тулд нөөц хавтсыг гарт бэлэн байлгана.
Системийн ашиглалт ба үргэлжлэх хугацаа
Цайны түвшний хавтангийн зузааныг зохицуулах крипсийг зөв ашиглавал, тусгайлан дахин ашигладаг системийн хувьд тэдгээрийн ашиглалтын хугацааг уртасгах боломжтой. Хэрэглэсний дараа крипсийг сайтар цэвэрлэж, цаашдын ажиллагаанд нөлөөлөх боломжтой цементийн үлдэгдлийг арилгаарай. Хэлбэрээ алдах эсвэл гэмтэхээс сэргийлэхийн тулд крипсийг цэвэр, хуурай газар хадгална уу. Гэмтэл эсвэл износ байгаа эсэхийг энгийн шалгаж, хэрэв гэмтэл илэрвэл солино уу.
Ирээдүйн төслүүдэд илүү сайн үр дүн гаргахын тулд цайны хавтангийн түвшнийг зохицуулах хэрэгслүүдийнхаа нөөцийг зохион байгуулан, ямар төрлийнх нь ямар нэгэн хэрэглээнд илүү сайн ажиллаж байгааг тэмдэглэж аваарай. Энэ мэдлэг нь ирээдүйн суурилуулалтыг хурданшуулах, олон төслийн турш тогтвортой үр дүн гаргахад тусална.
Ихэнх асуултууд
Нэг цайнд хэдэн ширхэг түвшнийг зохицуулагч крипс хэрэгтэй вэ?
Хэрэгтэй крипсийн тоо нь цайнд хавтангийн хэмжээ, хэлбэрээс хамаарна. 30x30 см хүртэлх хавтангийн хувьд тал бүрт дор хаяж 2-3 крипс ашиглана. Их хэмжээтэй хавтангийн хувьд тал бүрт 3-4 крипс шаардлагатай байж болно. Жигд бус хэлбэр эсвэл хүнд хавтангийн хувьд зөв түвшинд байлгах, дэмжихийн тулд нэмэлт крипс шаардлагатай байж болно.
Тайл засварын хавтсийг дахин ашиглаж болох уу?
Зарим чанартай тайл засварын системүүд дахин ашиглагдах хэсгүүдийг санал болгодог боловч ихэнх хавтсууд нэг удаа л ашиглах зориулалттай. Тагнууд эсвэл шургуулуудыг ихэвчлэн дахин ашиглаж болно, гэхдээ суурийн хавтсууд нь ихэвчлэн авах үед хугардаг. Сонгосон системд дахин ашиглагдах элемент орсон эсэхийг ямагт үйлдвэрлэгчийн зааврыг шалгана уу.
Тайл засварын хавтсыг хэзээ авч хаях ёстой вэ?
Тайл засварын хавтсыг цемент хангалттай хатсны дараа, гэхдээ шугамын ажил хийхээс өмнө авч хаях ёстой. Энэ нь орчны нөхцөл болон цементний төрлөөс хамааран суурилуулсны дараа ихэвчлэн 24-48 цагийн дараа хүлээхийг шаарддаг. Хавтсыг резинэн гутлын тусламжтайгаар таслагдах цэгт нь онгойлгох эсвэл үйлдвэрлэгчийн зааврын дагуу авч болно.